how to organize a bulk foods pantry
 I have a deep love for “the pantry.” My favorite part of period films and shows like Pride and Prejudice and Downton Abbey is the peeks into inner kitchen workings and the hallway-like pantries. Proper food storage in those days was a big deal because often one couldn’t just run to the store to replace something that was spilled, moldy, or stale. What I especially like about them is that the food contained in such pantries is actual food, not packets, powders, and packages.
The kitchen gods have never seen fit to bestow on me a proper walk-in pantry with flour bins built into the cupboards and pie shelves . The closest I got was a large kitchen closet at our last place. Even though there was plenty of square footage, it wasn’t properly laid out for easy storage. The shelves were several feet deep which made everything hard to see and therefore organize. Added to the problem was my habit of buying most of my dry goods in bulk. I constantly have little dribs and drabs of different grains, flours, spices, ect. A knotted up bag of flour doesn’t stack as easily as all those neat rectangular boxes of Cheerios.
Whenever I would turn to the interwebs for organizing wisdom, I could never find helpful advice for pantries built around bulk buying. Even the organizing Mount Olympus of Pinterest refused to send me messages in my bulk bought tea leaves. Like some kind a snarly sage, whenever I would inquire of “pantry organization,” it would spit back unhelpful pictures like these:
Source: thehousethata-mbuilt.blogspot.com via Rachel on Pinterest
Source: abowlfulloflemons.blogspot.com via Morgan on Pinterest
While most of them were visually pleasing and very well organized (and I especially love the creative use of a shoe rack) they were not helpful for my slouchy bag problem. After some trial, error, rearranging, more error, and some reflection, I’ve gathered a few tips I wish I’d known before I started my pantry.
Tips for Organizing a Bulk Foods Pantry
- Become a canning jar hoarder.
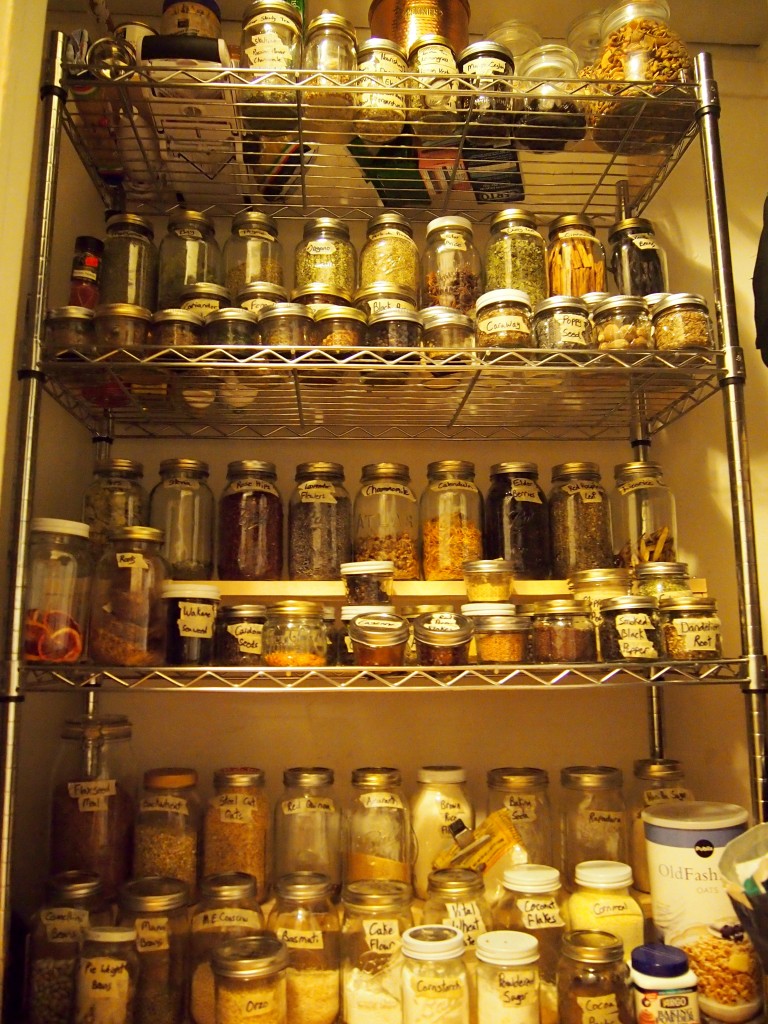
The worst thing you can do is leave all your bulk purchases in the flimsy plastic bags in which you bought them. Actually, the it’s worse if you failed to write the actual name down, not just the product code! (5546? How on earth do you cook 5546?) If you’ve read anything about general organization, you know that the easiest way to make a group of disparate items look organized is to put them in matching containers. While you may choose any container you’d like, I’m partial to the humble canning jar. They are easily available and relatively cheap, especially during the summer months. They come in all different sizes so it’s easy to accommodate anything from precious pinches of saffron to pounds of black beans. Unlike plastic, the glass won’t hold onto strong smells like garlic powder, so it’s easy to reuse them for other foods or for different projects all together. They also seal tightly, thus keeping out pantry moths, ants, and even mice.While it’s taken me a few years to build up such a stash of jars, it’s really amazing how fast they multiply once you begin intentionally collecting them. Almost every hardware and big box store stocks them during the summer. You’ll also learn to keep an eye out for them at thrift stores and yard sales. Check around in your community as there may be older ladies who are past their canning prime and have jars they don’t use anymore. The last place I’d buy from is online retailers. Their prices tend to be higher and shipping further whittles away at any economy. Of course, if you’re not obsessive about having identical containers, you can reuse your mayonnaise and Thai green curry jars from the grocery store. Just be sure to air them out well to eliminate any odors. For strong smells, scrub them with baking soda. Always make sure to air dry completely before filling with your bulk treasures. - Label everything clearly
Be as specific as you can. Is that whole wheat or white whole wheat flour? Bread or pastry? Coarse ground or fine? While it might seem tedious, you’ll be glad of it later when you’re making an angel food cake and need to know if that jar is all purpose or cake flour. If you have the time and inclination, you can be as creative with this as you’d like. I’ve seen many an artful jar that’s been accessorized with chalkboard paint, computer generated labels, and even etching. I however like to keep things both simple and free of commitment. Too often I’ll be obsessed with an ingredient for a fortnight (red quinoa! how I love thee!) only to forsake it for three months thereafter. The exact foods in my pantry are constantly rotating depending on the season, sales at the store, and personal preference. Therefore, I needed a labeling system that was just as interchangeable as my nuts and spices. Old fashioned masking tape and a permanent marker fit the bill nicely. The labels are clear and easy to replace when the contents of the jar change. They also continue the uniformity of the jars. - Keep your goods in a dark cool space
I know Pinterest is full of charming spice racks set hung over stoves with pots of soup cozily boiling away. But if you are serious about actual cooking not just the appearance of cooking, you will learn to keep your pantry items (and spices especially) away from heat and light. They degrade your bulk items, making them go stale faster. If you don’t have a closet outside the kitchen, at least use the cupboard that’s furthest away from your stove. - Do your best to make your shelves one jar deep
The problem with most pantry shelves is that they are too deep. Unless you are stock piling cans of soup and bottles of water for emergencies, deep shelves just make it easier to loose things. If you have the space and ability, you could build simple shelves on a wall like Erick and Kelly at Root Simple. Since we’re renting, I wasn’t comfortable putting up so many shelves. And with an ever growing toddler on the loose, I needed something contained. I opted to use a metro shelf and build customized shelves to get the “stadium effect.” (Shelf tutorial to be posted soon!) What’s important is you being able to see all of your jars easily to ascertain what and how much you have. - Keep like items together
This is something I learned while working in retail. Shelves will look more organized and items will be easier to find. While you will have to figure out what this means for your cooking patterns, for me it meant grouping my jars into categories of spices and cooking herbs, grains, legumes, teas, medicinal herbs, and snacks.


