THIS IS AN INDEX HA HA HA
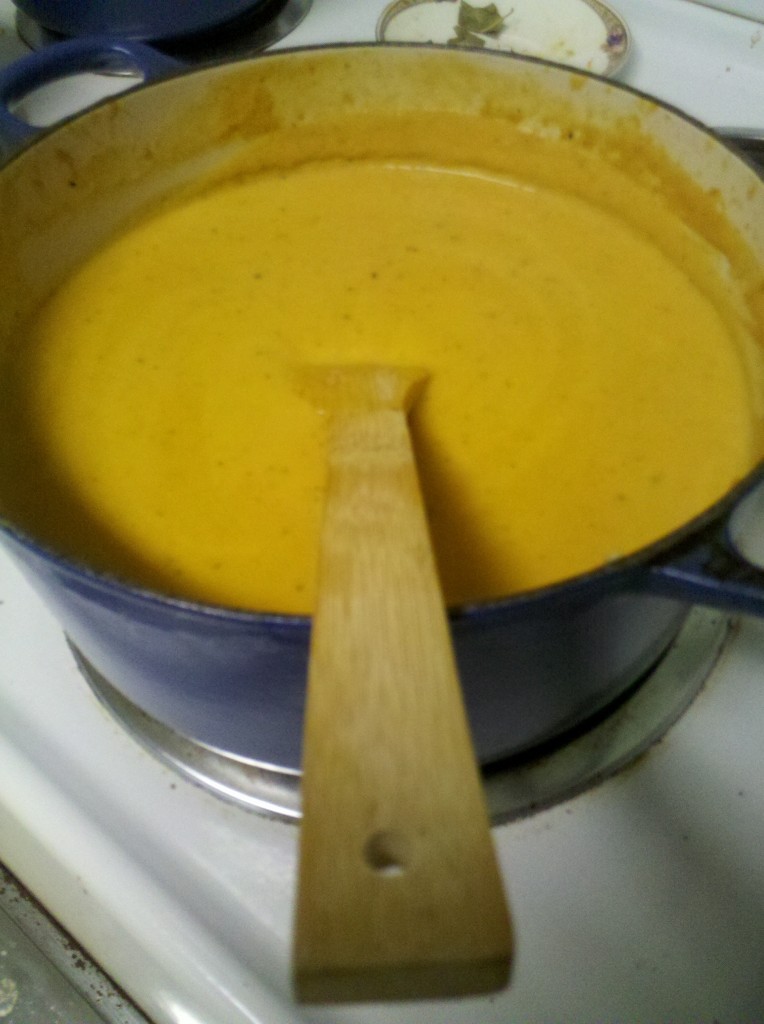 You’ll have to forgive the anachronism of this recipe. It’s been wafting around my draft folder for months, but with one baby and another, I just never got around to publishing it. So even though summer has spread its steamy cloak over all of us, I hope you’ll remember this recipe the first time you wish you had brought a sweater with you.
Spiced Butternut Squash Soup with Cardamom and Lemongrass
1 large or 2 smallish butternut squashes
2 Tbs coconut oil
1 onion, peeled and chopped
4 cloves garlic, peeled and chopped
1 tsp cardamom seeds
1 granny smith apple, cored and chopped
2 large carrots, chopped
2 Tbs apple cider vinegar
1 cinnamon stick
2 bay leaves
1 stalk of lemongrass*
1 1/2- 2 quarts chicken stock
salt and pepper
1 cup heavy cream
Greek yogurt (opt)
Dried apples (opt)
Preheat oven to 375°. Cut squash in half and scoop out the seeds. Lay the halves cut side up on a baking dish. Rub with oil and sprinkle with salt and pepper. Roast for about an hour, or until fork tender. Let cool while completing next steps. (This step can also be done up to a few days ahead of time. Just wrap the cooled squash and put it in the fridge until ready to continue.)
Melt coconut oil in a large heavy pot. Add onions and cook on medium low heat until they are translucent. Add the garlic and cardamom seeds, stirring until fragrant- about 45 seconds. Increase the heat to medium high and add the apple and carrot. Saute until they are softened and there is a nice crust on the bottom of the pan. Deglaze the pan by adding the vinegar and scraping up all the brown bits. Add 1 quart of the stock , the cinnamon, the lemongrass, and the bay leaves. While waiting for that to boil, scoop the cooled squash flesh out of the shell and add to the pot. Once boiling, reduce the heat and simmer for 10 to 15 minutes to allow the flavors to meld and vegetables to completely soften.
Remove from heat and use a stick blender to puree the soup. Take your time with this step. There’s few things as culinarily undesirable as finding chunks in your soup that look as if they’ve already been half chewed. (If you don’t have a stick blender, carefully pour the soup into a bar blender and puree in batches. Then return to the pot.) The soup will likely be very thick, about the consistency of mashed potatoes. Use the reserved stock to thin it to your desired consistency. Return the pot to the stove and reheat if necessary. Just before serving, stir in the heavy cream. Garnish with Greek yogurt and chopped dried apples.
*Look for it at Asian grocery stores. Or, if you live in Columbia, pick some up at City Roots.
Posted 13 years, 5 months ago at 10:40 am. Add a comment
 Little Guy.
Baby Bear.
Theo.
Buddy Bear.
The Little.
Thed.
Snuggle Bug.
Little Burrito.
Buddy.
Little Bear.
Sweet.
Glo Worm.
Teddy.
Cutie Patootie.
Mine.
Ours.
Theodore Mark.
Posted 13 years, 5 months ago at 9:11 am. 2 comments
 There is a new sight around Casa de la Fredericks these days: Little Man Clothes! I know the day will quickly come when this sight is so commonplace to me that it will inspire chagrin more than anything else. But for now it gives me a little buzz to see all these eensy little things hanging in a row. For such tiny things they sure take up vast amounts of clothes pins!
While I don’t seem to have ever caught the full-out nesting bug of pregnancy (mostly I’d just rather sleep than clean the base boards), I have been perusing unknown areas of thrift stores recently. Like the baby clothes and children’s books. There is the usual rush of finding some unexpected and unlooked for treasure in a pile of dusty debris. But there’s also the added frisson of knowing that my baby is going to wear that onesie someday and I ‘m going to read that book to my toddler someday. It’s the thrill of thrifting married to the insistence of nesting that makes shopping for used baby items so addicting. It’s thristing. Or is it nefting? I’m inclined to go with nefting.
And the “Find of the Day” prize goes to:
 The vintage, well loved copy of The Wind in the Willows.
I can’t wait till Theodore’s old enough to read this with me. We can discover this classic together, as I haven’t ever read it either.
Posted 13 years, 7 months ago at 8:48 pm. 7 comments
 A wet black tree all
smothered by downy green leaves
seeps serenity.
Posted 13 years, 8 months ago at 4:06 pm. Add a comment
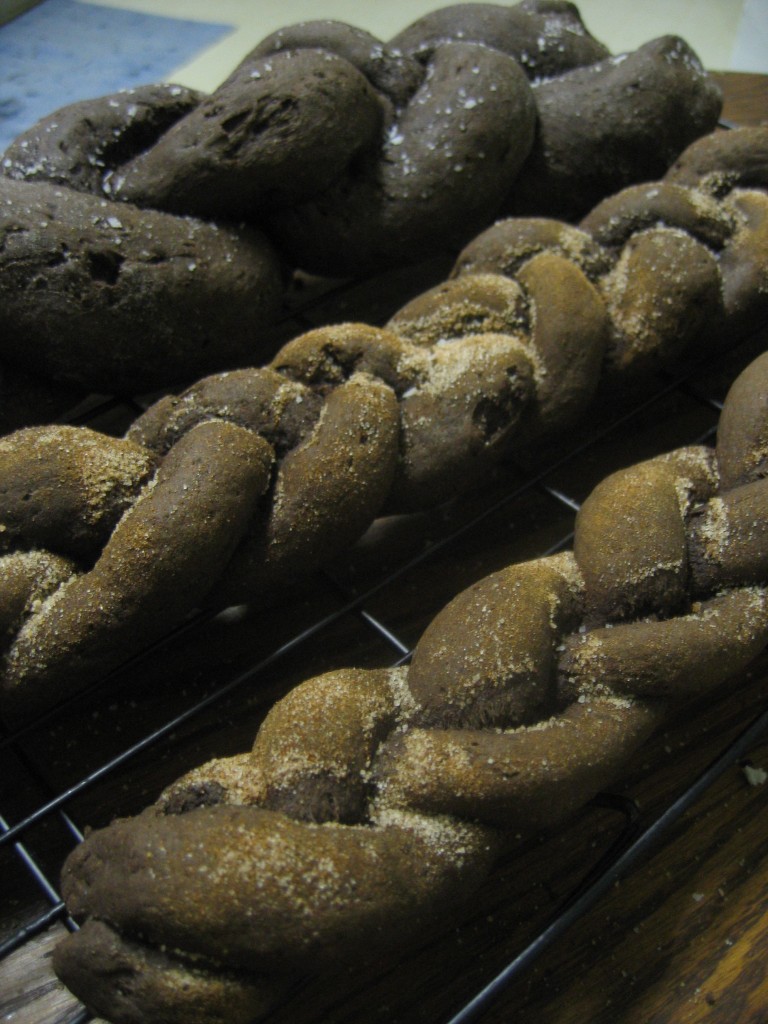 These were supposed to be cookies.
It all started with about an eighth of a cup of leftover sourdough starter that I just couldn’t bear to throw out. There had to be something I could make with it, right? A quick internet search revealed these sourdough cookies whose feet seemed to fill the shoes quite nicely. But, as often happens to me, I hadn’t even finished reading the recipe before I was fiddling with the specifics, imagining how I could tweak, alter, and otherwise change the recipe to fit my tastes. I’d had a hankering for spicy Mexican chocolate recently, so cocoa powder and cinnamon were added to the ingredient list. I also thought that a whole cup and half of sugar seemed excessive. Most recipes, even for sweet things, that I make these days rarely call for much more than 3/4 cup sugar. A full cup if I’m feeling generous and amiable toward the world. So obviously the sugar would need to be cut back. And why not go ahead and double it? If I’m going to the trouble of making cookies, why not have plenty to enjoy and share?
Even as I started the venture, a lecture was rolling in my head. “You know you’re not a baker, Jana. Perhaps you should rethink all these amendments and just make the recipe as is. Or at least choose just one alteration.” But I skipped ahead with an optimism born of past cooking successes. Hadn’t I turned those leftover scrambled eggs and sausage gravy into killer breakfast pitas? What about all the leftovers I’ve cunningly foisted in under the roof of “fried rice”? Surely something with such good things as butter, eggs, and chocolate can’t go too horrible askew, right? Six cups of flour, about a quarter of a box of cocoa powder, and God only knows how much cinnamon later, the cautionary voice in my head was proved right.
I am not a baker.
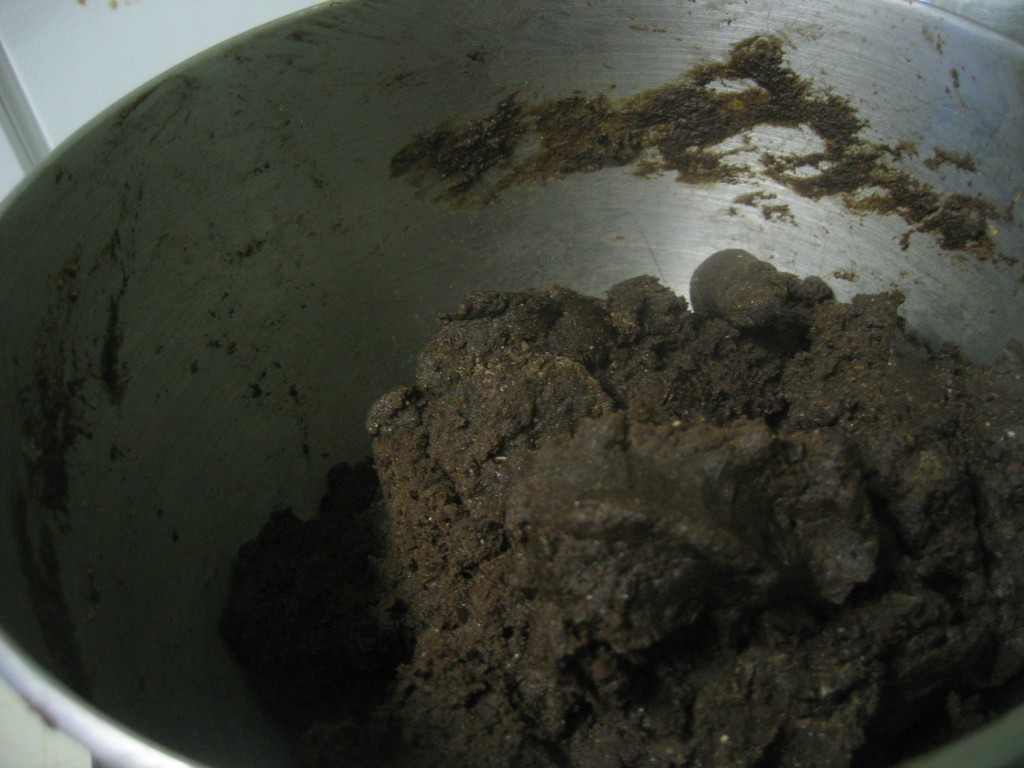
On the counter stood a bowlful of not quite bad, not really delicious, but definitely wheat-y tasting cookie dough. Don’t let the rich chocolate-y color deceive you. The thing stared me down, hands on hips, eyebrows raised, lips pursed. If it had been a miffed fourteen-year-old girl, it couldn’t have been more sassy. “So what now, Miss Creative Genius of the Fry Pan? Where’s your artistry now, huh?”
I quailed before it.
What had begun with my refusal to waste a few tablespoons of starter now had morphed into a giant ethical dilemma for my frugal nature. Here was a bowlful of half a dozen eggs, two sticks of butter, the last of my stock of chocolate, not to mention my cracking pride. The bowl had all these things in it, but what it definitely did not have was cookie dough. What to do? To give up and throw it out would be to admit defeat and make the waste of that dollop of starter sting even more. But I couldn’t possibly make cookies with it as it looked more like the pizza dough I’d made earlier that afternoon.
And with that, a thought occurred to me with the force and clarity of a forgotten proverb. If it looks like bread, tastes like bread, and acts like bread, then it probably is bread. And so I treated it like bread.
I debated whether or not to post the actual “recipe” for this bread. After all, it was a complete mistake. Since I didn’t even measure half the ingredients, how could I even be sure what the “actual recipe” was? However, I decided that the bread was good enough that I might actually want to make it again- in which case I would appreciate having a place to start from. So, baker beware! The following recipe should not be taken as gospel truth but instead as a draft that the baker ought to edit.
After a few tries of fashioning a free form loaf that always ended up looking like, well, some other amorphous brown substance, I settled on making braids. Though I tried several different sizes, I think the thicker the strands, the better.
Chocolate Sourdough Braid
1 cup butter
1 1/2 cup sugar
2 tsp vanilla
4 eggs
2 cups fresh sourdough starter
1/4 cup water
4 cups white whole wheat flour
2 cups whole wheat flour
2 tsp salt
1 tsp baking powder
1 tsp baking soda
1/2- 3/4 cup cocoa powder
3-5 T cinnamon
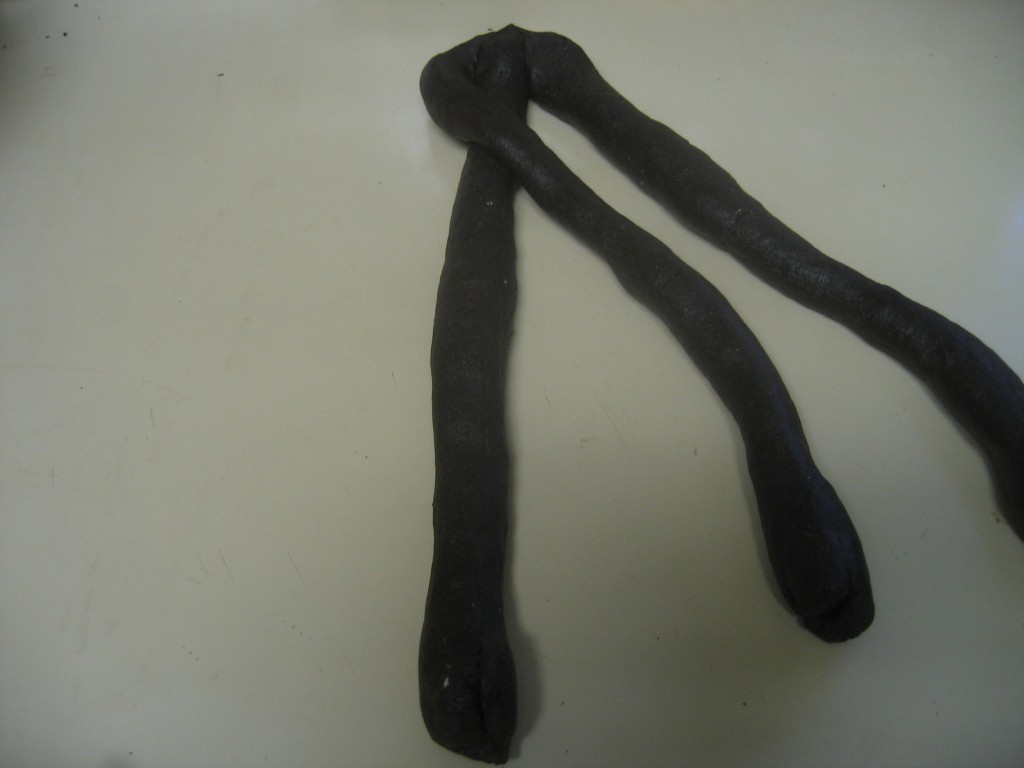
Preheat the oven to 375 degrees. Cream together butter and sugar. Add eggs one at a time. Then add the vanilla extract. Gently mix in the water and sourdough starter. In a separate bowl, mix together the dry ingredients. Combine the wet and dry ingredients. Allow the dough to rest for 15 minutes. To make the braids, take three equal balls of dough (the size is up to you, just make sure they are all equal). Using your palms, roll each ball into a long log, just like how you did with playdough as a three year old. 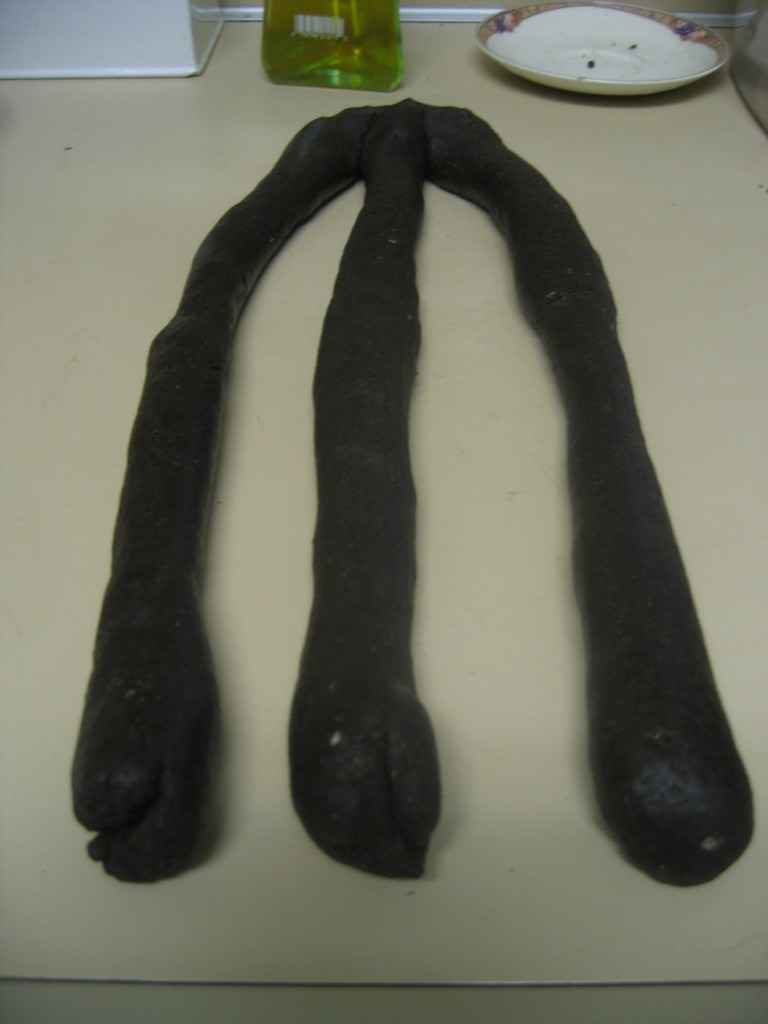 Next, squish the top ends of the logs together. You are going to braid the strands together, just like hair. If you haven’t braided before, go find someone’s little sister to help you. Or use the pictures below.


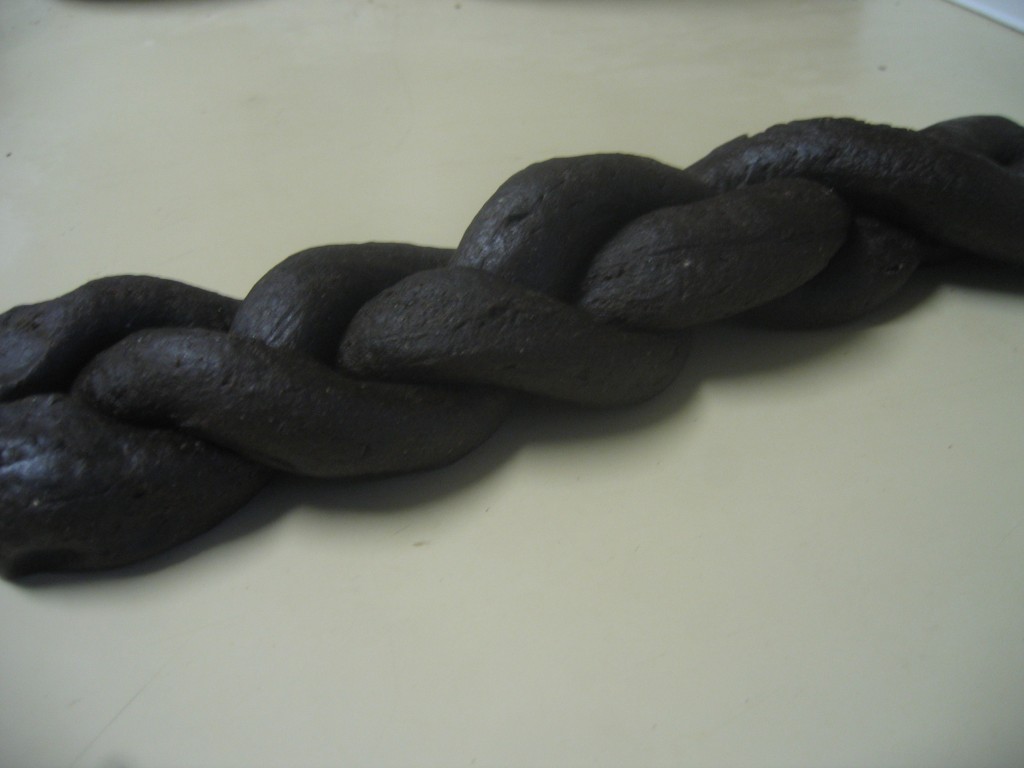 Once you’re done braiding, carefully transfer the loaves to a baking sheet. You can sprinkle them with cinnamon and sugar if you’d like. Or try coarse kosher salt, my personal favorite. Bake in the oven for 12-3o minutes, depending on the thickness of your loaves. Skinnier loaves will take less time, while thicker ones will take more time. To take the guess work out, use a probe style thermometer and bake the bread until it’s temperature reaches 200°. Cool on baking racks. Enjoy with butter, greek yogurt, or ricotta cheese.
Posted 13 years, 8 months ago at 8:52 pm. 6 comments
 Wishing and hoping and thinking and praying
Planning and dreaming each night of your charms…
Posted 13 years, 9 months ago at 6:51 pm. 1 comment
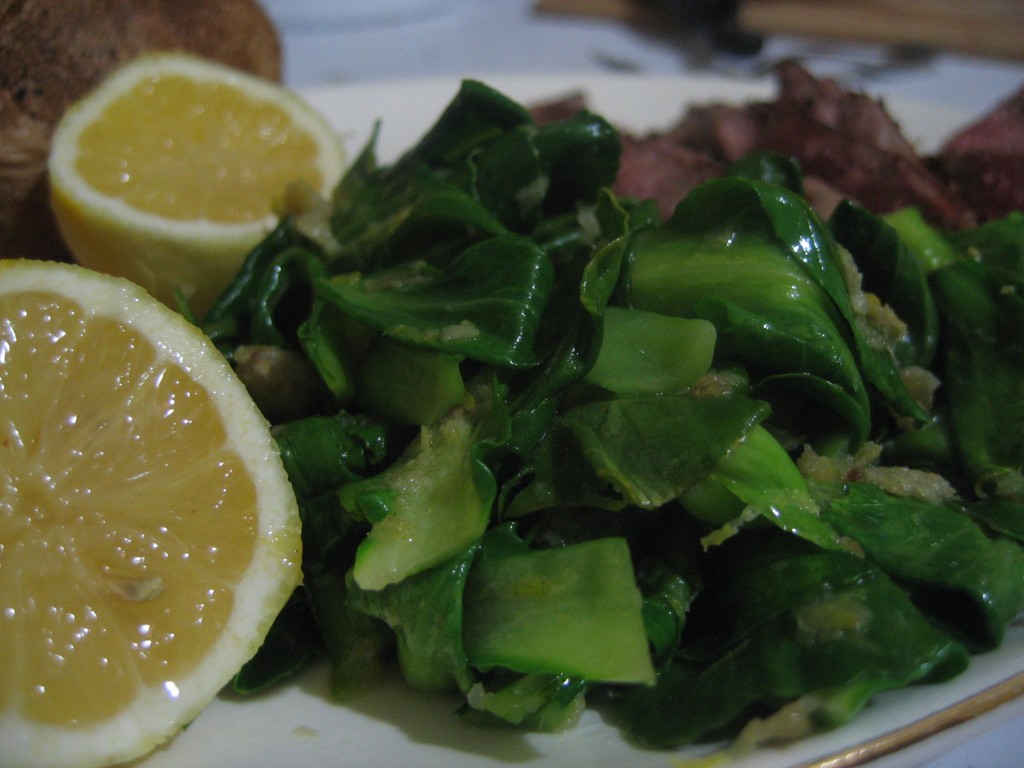 I am sadly less than proficient when it comes to Asian vegetables. You’d think all the time I spent in Asia would have up-ed my skill level (or at least awareness) a bit, wouldn’t you? But alas, during my years there if I thought about food at all, it had to do with how many “weird” things I could eat in order to impress people back in the States. Therefore, while I certainly ate my fair share of traditional Filipino food, I missed out on the finer points of what the vegetables actually were and how they were prepared.
Today, my co-farmer, Ben, alerted me to the fact that we will be harvesting baby bok choi on Friday. As far as Asian vegetables go, I know bok choi is pretty mundane, but even so I wasn’t familiar with it. Like most brassicas, bok choi gets sweeter with the colder weather. Because of all the frosts (not to mention snows) we’ve had this winter, the bok choi leaf I sampled was as sweet as any summer corn I’ve tasted. Sweet and almost lemony but with a definite cabbage-y twang, like a farm girl who can’t quite banish the drawl from her voice. As delicious as it was raw, Ben counseled that they are even better cooked– but not too much. Bok choi, also like other brassicas, gets extremely bitter when over-cooked.
After doing my “new vegetable encounter” Wikipedia search, I learned that in traditional Chinese thought bok choi is a cool vegetable. In order to counter balance the coolness, a warming ingredient is added, such as garlic or ginger. I figured that was as good a place to start as any. That, combined with my first impressions of the raw leaf as having distinct lemony undertones, gave birth to this dish. While I served it with beef, I think it would make a fantastic bed for some fresh fish from the farmer’s market.
Bok Choi with Ginger and Lemon
1 bag bok choi (about 1/3 lb.)
1 TBS butter
1 in piece of ginger, peeled
zest from one lemon
salt
Using a fine grater, grate the ginger and lemon zest; set aside. Cut the ends off the bok choi, wash in cold water, and dry well. In a medium sized pan, heat the butter over medium-low heat. When it just barely sizzzles, add the ginger. After a few seconds (when the gingery aroma reaches your nose), add the bok choi and lemon zest. Stir with tongs until its evenly coated in butter, ginger, and zest. Cook until mostly wilted (about a minute). Turn off the heat when most of the leaves are wilted. Continue stirring as the residual heat cooks the rest of the leaves.
Posted 13 years, 9 months ago at 9:23 pm. Add a comment
 Continuing in the tradition of my family, Mr. Quotidian and I celebrated our anniversary over a period of several days. I quite like that unintentional tradition. Relationships like marriage take time to unfold… what’s wrong with letting the celebration unfold in a similarly leisurely fashion?
Since both of us were busy on our actual anniversary, we simply read our vows aloud again as we sat on the couch after dinner. Because our vows were more than just private promises we made, I posted them on Facebook and here on my blog, in an effort to display them in full view of our family and friends. While marriage in this culture is conducted privately, it is still a public institution. For all the ways the internet has detracted from personal life, I have come to be grateful for the easily available public forum it gives.
Continue Reading…
Posted 13 years, 10 months ago at 7:23 am. 2 comments

I Jana, take you Gary,
To by my husband from this day forward,
To join with you and share all that is to come
In youth and in old age,
In strength and in weakness,
In happiness and in apathy,
In wholeness and in brokenness,
In faith and in doubt,
In expectation and in disappointment.
Forsaking all others, I will love and cherish you
Until death parts us.
Posted 13 years, 10 months ago at 8:40 pm. Add a comment
 Pot roasts are old standbys that, depending on how the cooking was at your house growing up, either makes you have to wipe a little Pavlovian drool from your lips or leaves you in a cold sweat and reaching for the delivery menu. I’m thankful to have grown up in a home where pot roasts were of the drool inspiring variety. They were always made the same: an assortment of vegetables layered in the bottom of the pot to soak up all the juices from the roast laying on top. For as much as I agree with the philosophy of not cooking your veggies to death, I must admit that there is something magical that happens when you stew carrots, potatoes, and onions for six hours in beef drippings.
It has taken me a long time to get comfortable cooking meat. Not because of any past dietary principles (I’ve always been quite the omnivore), but simply because I was intimidated. I stuck with plain ground beef for a long time– all through college, post college, and probably my first year of marriage. Ground beef is the one cut of meat I remember helping my mom with while growing up. It was frequently my job to brown the beef for whatever other dinner applications it was destined for. I felt confident in knowing how ground beef worked. Throw it in the pan, break it up with a wooden spoon, and cook until it’s all the same color. No confusing steps like “sear till a crust forms,” “slice across the grain,” or “carve.” Unlike other cuts of beef that might turn raw in the middle if you looked at them wrong, it was easy to tell when ground beef was done. Even once I was a more confident cook and could roast a whole chicken with the rest of ‘em, I still had a mental block against any other cuts of beef. So it wasn’t until I’d gone in with a friend and bought a side of beef from a farmer friend that I really began cooking steaks and roasts on an actual stove or oven. I’ve studied the cookbooks, watched the YouTube videos, and scrutinized the how-to charts while broiling, sauteing, roasting, searing, and grilling my way through a quarter of a cow.
And so other cuts of beef are no longer as intimidating as they once seemed. Like any skill, it takes time, patience, attention to detail, and multiple tries to get it down. That and a willingness to swallow your pride, take the platter from the table, and put the roast back in the oven for 15 minutes to finish cooking.
For those of you who might secretly also have hunkabeefphobia, this is a simple recipe that is really hard to mess up and so is sure to build your meat cookery confidence. What’s more, it takes advantage of the cheaper cuts of beef that have a lot of chewy connective tissue that takes hours to melt down. So even if you do mess it up, it’s at least not as expensive of a “misteak.”
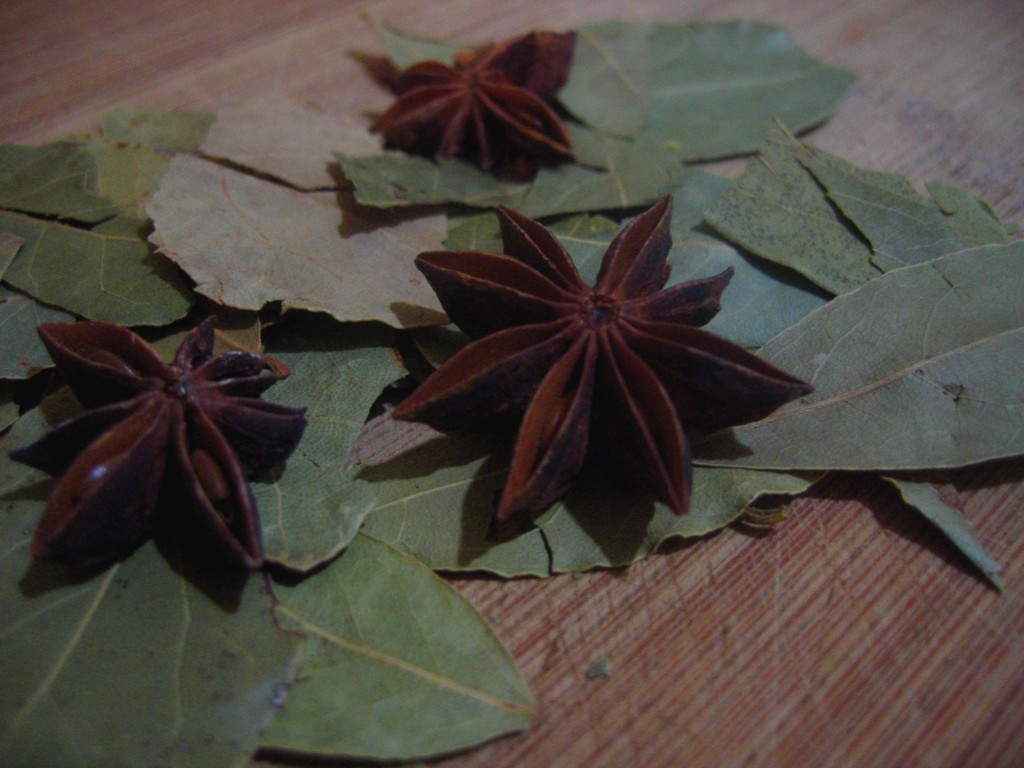
The method is the same for any pot roast in a crock pot– put the meat in, cover with some liquid, and let it cook for about 6 hours. Other ingredients, like vegetables, can be added. You can also be creative with your spice use. Don’t feel limited to the same old salt and pepper. Try a Mexican spiced combination, or go for an herby Italian roast. I’ve tried pot roasts lots of ways, and most of them have been quite good. However, the bay leaf and star anise combination I’ve really come to love. I prefer subtle flavors to let the gorgeous beefiness of my grass-fed roasts shine, and these two spices play backup singer quite nicely. The bay imparts a floral aroma and herbal taste while the star anise adds a surprising zing of Asian flair and permeates the whole dish with that can’t-quite-put-your-finger-on-it umami flavor.
Bay Leaf and Star Anise Pot Roast with Gravy (in a Slow Cooker)
A 4ish pound roast (shoulder, chuck, rump, round, London broil)
3 cups water
1/2 cup cider vinegar
salt and pepper
2 star anise or equivalent amount of pieces
2-3 bay leaves
2 carrots, peeled and roughly chopped (opt)
2 stalks celery, roughly chopped (opt)
2 onions, peeled and cut into chunks (opt)
2 potatoes, cut into chunks (opt)
4 Tbs butter
6 Tbs flour
If using the veggies, layer them in the bottom of the slow cooker. Sprinkle both sides of the roast with salt and pepper and lay in on top of the veggies. Pour in water and vinegar. Float the bay leaf and star anise on top. Put the lid on, turn the cooker to low and cook for 6-8 hours. (Less time will leave you with a more structured roast that holds together. Longer time will give you falling off the bone meat. Both are good.)
When the meat is done to your liking, remove it and tent with foil to rest and reabsorb its juices. Also remove the veggies and keep in a warm oven. Pour the liquid into a large saucepan and bring to a boil. In a separate bowl, mix together 4 tbs butter and 6 tbs of flour. Whisk this mixture into the liquid thoroughly and bring to a boil. Simmer gently, stirring often, until it thickens into a gravy. Serve it over the meat and veggies.
You will probably have leftover gravy. I chop up any extra roast, mix it with the reheated gravy, and serve it over crusty bread the next day.
Posted 13 years, 10 months ago at 9:09 pm. 4 comments
 You’ll have to forgive the anachronism of this recipe. It’s been wafting around my draft folder for months, but with one baby and another, I just never got around to publishing it. So even though summer has spread its steamy cloak over all of us, I hope you’ll remember this recipe the first time you wish you had brought a sweater with you.


