When Mr. Quotidian began comparing my kitchen projects to witchcraft, I thought he was on to something more than the jars bubbling and fermenting on the counter. He made me realize how we’ve let the word “craft” slip from our vocabulary. Hardly anyone now practices a craft; we now merely aspire to be experts. We cram our minds with knowledge, leaving nothing for our hands to do. To talk about craft you either have to be a preschool teacher or a Wiccan. Instead of continuing to let craft slide into the realm of Elmer’s glue and eye of newt, I want to take hold of it and pull it back to its rightful place in my vocabulary.
Foodcraft is a place where I will practice my craft. You will find recipes here, surely, but also thoughts on ingredients, health, and food applications.
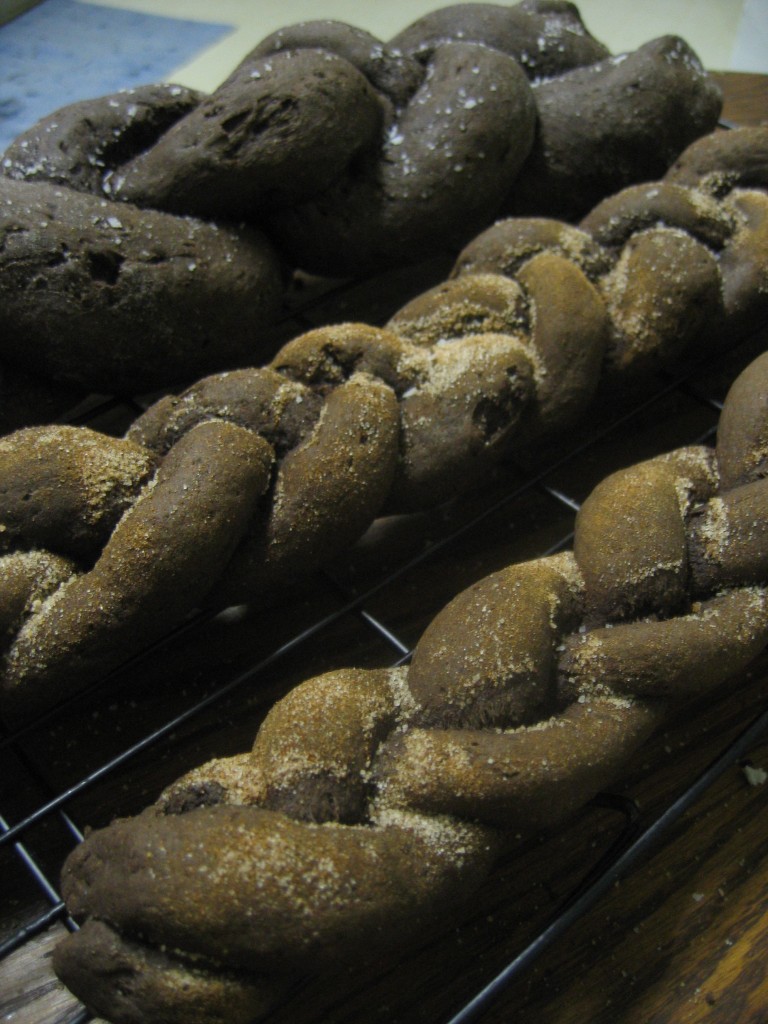 These were supposed to be cookies.
It all started with about an eighth of a cup of leftover sourdough starter that I just couldn’t bear to throw out. There had to be something I could make with it, right? A quick internet search revealed these sourdough cookies whose feet seemed to fill the shoes quite nicely. But, as often happens to me, I hadn’t even finished reading the recipe before I was fiddling with the specifics, imagining how I could tweak, alter, and otherwise change the recipe to fit my tastes. I’d had a hankering for spicy Mexican chocolate recently, so cocoa powder and cinnamon were added to the ingredient list. I also thought that a whole cup and half of sugar seemed excessive. Most recipes, even for sweet things, that I make these days rarely call for much more than 3/4 cup sugar. A full cup if I’m feeling generous and amiable toward the world. So obviously the sugar would need to be cut back. And why not go ahead and double it? If I’m going to the trouble of making cookies, why not have plenty to enjoy and share?
Even as I started the venture, a lecture was rolling in my head. “You know you’re not a baker, Jana. Perhaps you should rethink all these amendments and just make the recipe as is. Or at least choose just one alteration.” But I skipped ahead with an optimism born of past cooking successes. Hadn’t I turned those leftover scrambled eggs and sausage gravy into killer breakfast pitas? What about all the leftovers I’ve cunningly foisted in under the roof of “fried rice”? Surely something with such good things as butter, eggs, and chocolate can’t go too horrible askew, right? Six cups of flour, about a quarter of a box of cocoa powder, and God only knows how much cinnamon later, the cautionary voice in my head was proved right.
I am not a baker.
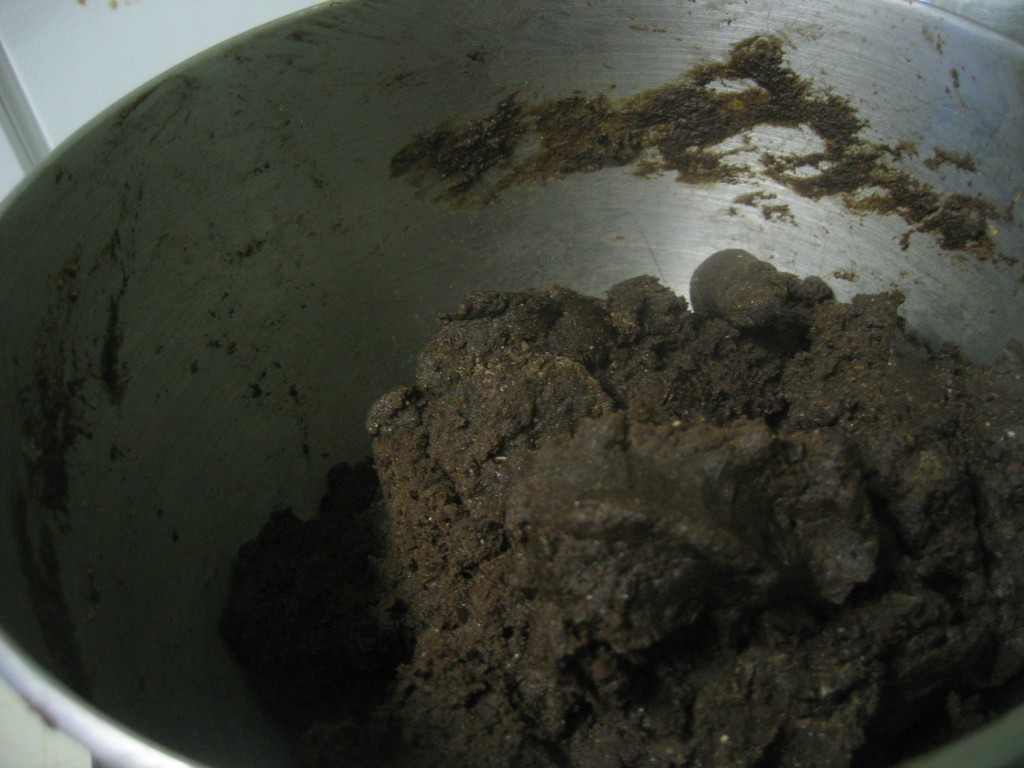
On the counter stood a bowlful of not quite bad, not really delicious, but definitely wheat-y tasting cookie dough. Don’t let the rich chocolate-y color deceive you. The thing stared me down, hands on hips, eyebrows raised, lips pursed. If it had been a miffed fourteen-year-old girl, it couldn’t have been more sassy. “So what now, Miss Creative Genius of the Fry Pan? Where’s your artistry now, huh?”
I quailed before it.
What had begun with my refusal to waste a few tablespoons of starter now had morphed into a giant ethical dilemma for my frugal nature. Here was a bowlful of half a dozen eggs, two sticks of butter, the last of my stock of chocolate, not to mention my cracking pride. The bowl had all these things in it, but what it definitely did not have was cookie dough. What to do? To give up and throw it out would be to admit defeat and make the waste of that dollop of starter sting even more. But I couldn’t possibly make cookies with it as it looked more like the pizza dough I’d made earlier that afternoon.
And with that, a thought occurred to me with the force and clarity of a forgotten proverb. If it looks like bread, tastes like bread, and acts like bread, then it probably is bread. And so I treated it like bread.
I debated whether or not to post the actual “recipe” for this bread. After all, it was a complete mistake. Since I didn’t even measure half the ingredients, how could I even be sure what the “actual recipe” was? However, I decided that the bread was good enough that I might actually want to make it again- in which case I would appreciate having a place to start from. So, baker beware! The following recipe should not be taken as gospel truth but instead as a draft that the baker ought to edit.
After a few tries of fashioning a free form loaf that always ended up looking like, well, some other amorphous brown substance, I settled on making braids. Though I tried several different sizes, I think the thicker the strands, the better.
Chocolate Sourdough Braid
1 cup butter
1 1/2 cup sugar
2 tsp vanilla
4 eggs
2 cups fresh sourdough starter
1/4 cup water
4 cups white whole wheat flour
2 cups whole wheat flour
2 tsp salt
1 tsp baking powder
1 tsp baking soda
1/2- 3/4 cup cocoa powder
3-5 T cinnamon
Preheat the oven to 375 degrees. Cream together butter and sugar. Add eggs one at a time. Then add the vanilla extract. Gently mix in the water and sourdough starter. In a separate bowl, mix together the dry ingredients. Combine the wet and dry ingredients. Allow the dough to rest for 15 minutes. To make the braids, take three equal balls of dough (the size is up to you, just make sure they are all equal). Using your palms, roll each ball into a long log, just like how you did with playdough as a three year old.  Next, squish the top ends of the logs together. You are going to braid the strands together, just like hair. If you haven’t braided before, go find someone’s little sister to help you. Or use the pictures below.


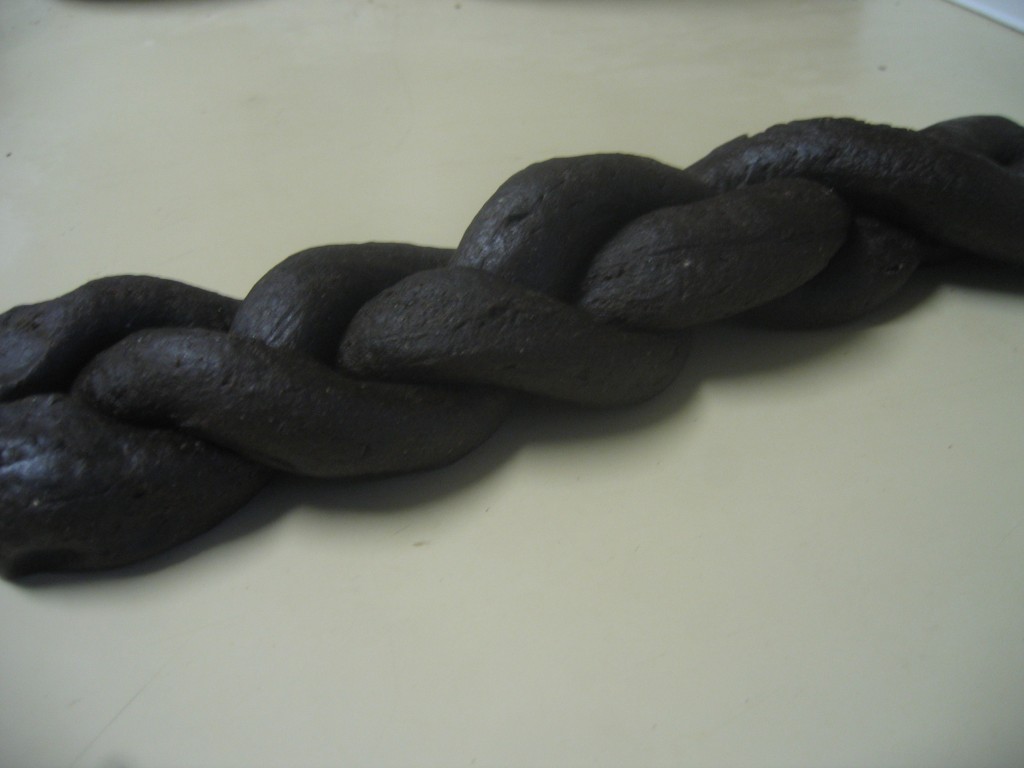 Once you’re done braiding, carefully transfer the loaves to a baking sheet. You can sprinkle them with cinnamon and sugar if you’d like. Or try coarse kosher salt, my personal favorite. Bake in the oven for 12-3o minutes, depending on the thickness of your loaves. Skinnier loaves will take less time, while thicker ones will take more time. To take the guess work out, use a probe style thermometer and bake the bread until it’s temperature reaches 200°. Cool on baking racks. Enjoy with butter, greek yogurt, or ricotta cheese.
Posted 13 years, 9 months ago at 8:52 pm. 6 comments
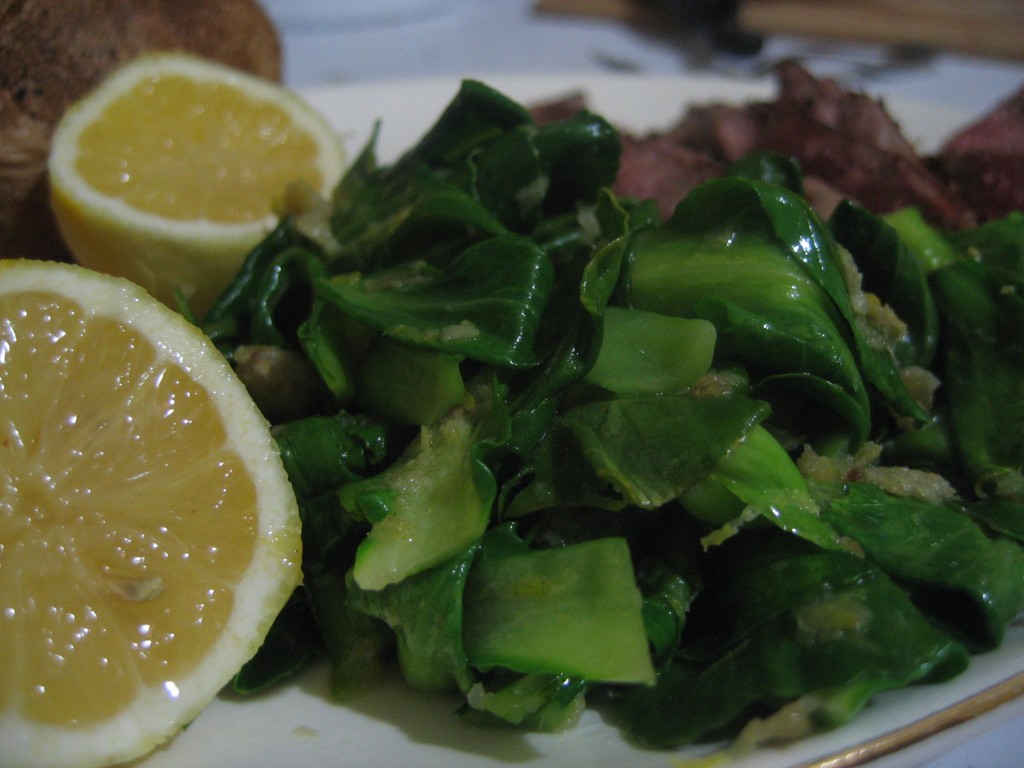 I am sadly less than proficient when it comes to Asian vegetables. You’d think all the time I spent in Asia would have up-ed my skill level (or at least awareness) a bit, wouldn’t you? But alas, during my years there if I thought about food at all, it had to do with how many “weird” things I could eat in order to impress people back in the States. Therefore, while I certainly ate my fair share of traditional Filipino food, I missed out on the finer points of what the vegetables actually were and how they were prepared.
Today, my co-farmer, Ben, alerted me to the fact that we will be harvesting baby bok choi on Friday. As far as Asian vegetables go, I know bok choi is pretty mundane, but even so I wasn’t familiar with it. Like most brassicas, bok choi gets sweeter with the colder weather. Because of all the frosts (not to mention snows) we’ve had this winter, the bok choi leaf I sampled was as sweet as any summer corn I’ve tasted. Sweet and almost lemony but with a definite cabbage-y twang, like a farm girl who can’t quite banish the drawl from her voice. As delicious as it was raw, Ben counseled that they are even better cooked– but not too much. Bok choi, also like other brassicas, gets extremely bitter when over-cooked.
After doing my “new vegetable encounter” Wikipedia search, I learned that in traditional Chinese thought bok choi is a cool vegetable. In order to counter balance the coolness, a warming ingredient is added, such as garlic or ginger. I figured that was as good a place to start as any. That, combined with my first impressions of the raw leaf as having distinct lemony undertones, gave birth to this dish. While I served it with beef, I think it would make a fantastic bed for some fresh fish from the farmer’s market.
Bok Choi with Ginger and Lemon
1 bag bok choi (about 1/3 lb.)
1 TBS butter
1 in piece of ginger, peeled
zest from one lemon
salt
Using a fine grater, grate the ginger and lemon zest; set aside. Cut the ends off the bok choi, wash in cold water, and dry well. In a medium sized pan, heat the butter over medium-low heat. When it just barely sizzzles, add the ginger. After a few seconds (when the gingery aroma reaches your nose), add the bok choi and lemon zest. Stir with tongs until its evenly coated in butter, ginger, and zest. Cook until mostly wilted (about a minute). Turn off the heat when most of the leaves are wilted. Continue stirring as the residual heat cooks the rest of the leaves.
Posted 13 years, 10 months ago at 9:23 pm. Add a comment
 Pot roasts are old standbys that, depending on how the cooking was at your house growing up, either makes you have to wipe a little Pavlovian drool from your lips or leaves you in a cold sweat and reaching for the delivery menu. I’m thankful to have grown up in a home where pot roasts were of the drool inspiring variety. They were always made the same: an assortment of vegetables layered in the bottom of the pot to soak up all the juices from the roast laying on top. For as much as I agree with the philosophy of not cooking your veggies to death, I must admit that there is something magical that happens when you stew carrots, potatoes, and onions for six hours in beef drippings.
It has taken me a long time to get comfortable cooking meat. Not because of any past dietary principles (I’ve always been quite the omnivore), but simply because I was intimidated. I stuck with plain ground beef for a long time– all through college, post college, and probably my first year of marriage. Ground beef is the one cut of meat I remember helping my mom with while growing up. It was frequently my job to brown the beef for whatever other dinner applications it was destined for. I felt confident in knowing how ground beef worked. Throw it in the pan, break it up with a wooden spoon, and cook until it’s all the same color. No confusing steps like “sear till a crust forms,” “slice across the grain,” or “carve.” Unlike other cuts of beef that might turn raw in the middle if you looked at them wrong, it was easy to tell when ground beef was done. Even once I was a more confident cook and could roast a whole chicken with the rest of ‘em, I still had a mental block against any other cuts of beef. So it wasn’t until I’d gone in with a friend and bought a side of beef from a farmer friend that I really began cooking steaks and roasts on an actual stove or oven. I’ve studied the cookbooks, watched the YouTube videos, and scrutinized the how-to charts while broiling, sauteing, roasting, searing, and grilling my way through a quarter of a cow.
And so other cuts of beef are no longer as intimidating as they once seemed. Like any skill, it takes time, patience, attention to detail, and multiple tries to get it down. That and a willingness to swallow your pride, take the platter from the table, and put the roast back in the oven for 15 minutes to finish cooking.
For those of you who might secretly also have hunkabeefphobia, this is a simple recipe that is really hard to mess up and so is sure to build your meat cookery confidence. What’s more, it takes advantage of the cheaper cuts of beef that have a lot of chewy connective tissue that takes hours to melt down. So even if you do mess it up, it’s at least not as expensive of a “misteak.”
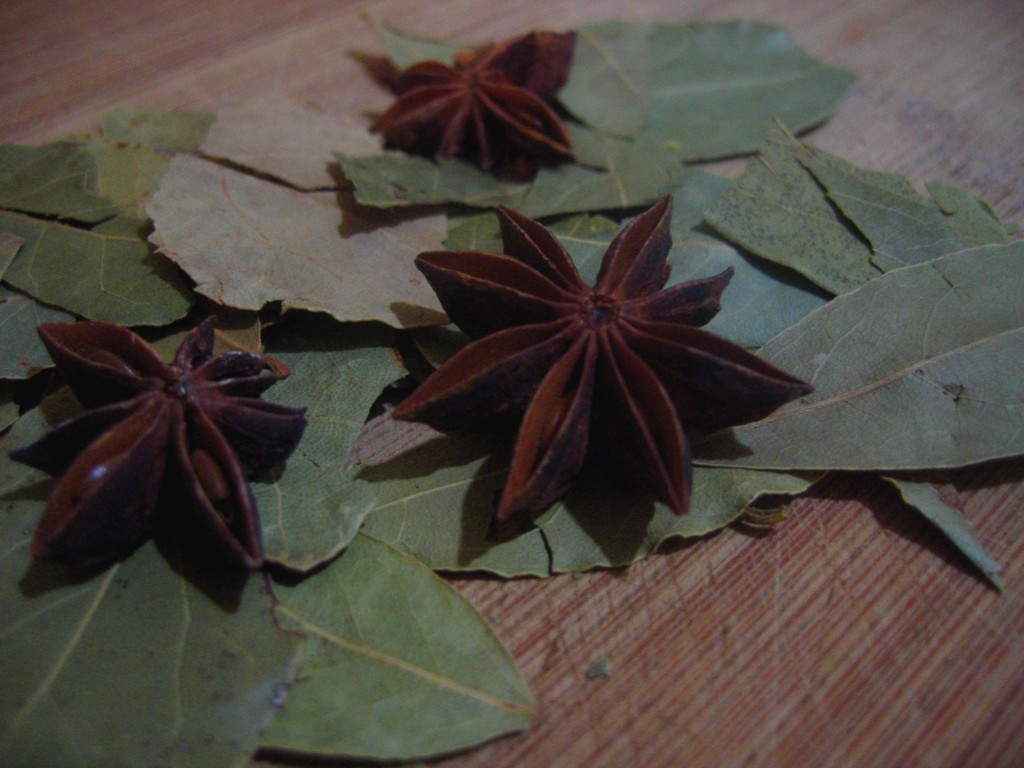
The method is the same for any pot roast in a crock pot– put the meat in, cover with some liquid, and let it cook for about 6 hours. Other ingredients, like vegetables, can be added. You can also be creative with your spice use. Don’t feel limited to the same old salt and pepper. Try a Mexican spiced combination, or go for an herby Italian roast. I’ve tried pot roasts lots of ways, and most of them have been quite good. However, the bay leaf and star anise combination I’ve really come to love. I prefer subtle flavors to let the gorgeous beefiness of my grass-fed roasts shine, and these two spices play backup singer quite nicely. The bay imparts a floral aroma and herbal taste while the star anise adds a surprising zing of Asian flair and permeates the whole dish with that can’t-quite-put-your-finger-on-it umami flavor.
Bay Leaf and Star Anise Pot Roast with Gravy (in a Slow Cooker)
A 4ish pound roast (shoulder, chuck, rump, round, London broil)
3 cups water
1/2 cup cider vinegar
salt and pepper
2 star anise or equivalent amount of pieces
2-3 bay leaves
2 carrots, peeled and roughly chopped (opt)
2 stalks celery, roughly chopped (opt)
2 onions, peeled and cut into chunks (opt)
2 potatoes, cut into chunks (opt)
4 Tbs butter
6 Tbs flour
If using the veggies, layer them in the bottom of the slow cooker. Sprinkle both sides of the roast with salt and pepper and lay in on top of the veggies. Pour in water and vinegar. Float the bay leaf and star anise on top. Put the lid on, turn the cooker to low and cook for 6-8 hours. (Less time will leave you with a more structured roast that holds together. Longer time will give you falling off the bone meat. Both are good.)
When the meat is done to your liking, remove it and tent with foil to rest and reabsorb its juices. Also remove the veggies and keep in a warm oven. Pour the liquid into a large saucepan and bring to a boil. In a separate bowl, mix together 4 tbs butter and 6 tbs of flour. Whisk this mixture into the liquid thoroughly and bring to a boil. Simmer gently, stirring often, until it thickens into a gravy. Serve it over the meat and veggies.
You will probably have leftover gravy. I chop up any extra roast, mix it with the reheated gravy, and serve it over crusty bread the next day.
Posted 13 years, 11 months ago at 9:09 pm. 4 comments

The weather here has shown an uncharacteristic propensity for white this winter. While she often indulges in her love for the sparkly white of frosts, she usually only dons the honest-to-God white stuff every four or five years. This season, which isn’t over yet, she has waltzed out in the swirly white dress no less than twice.
While I fully intended to make the trek to the farm, it seems that pregnant scooter-riding farmers get a snow day. With the unexpected day off, my thoughts turned to good snow day activities. I was having trouble staying warm… it seems Hemingway is taking all my body heat too. So, instead of going all the way outside, we did our snow activities from the window. While Mr. Quotidian held the window open, I leaned out and made our snow avatars. A tall snowman in Mr. Quotidian’s likeness was easy enough, but I had trouble with the pregnant snowife. So, as a compromise, I fashioned a little Hemingway snowman separately.

Nothing could be more of a soup day than a snow day, so I turned my attention towards dinner. For me, soup must include two things if it’s to be classified as a snow day soup. It must be based on real broth that has been simmering all day, and it must not require any ingredients other than what’s already in my fridge, freezer, or pantry. (Extra points for being able to use leftovers.) The requirements, though they might seem random, actually have some reason behind them. The on-hand ingredients stipulation is for the obvious reason that on a snow day you either can’t or don’t want to make the journey to the grocery store. The broth specification has to do with the anticipation factor. Snow days typically involve long stints under blankets punctuated by brief stints of outdoor frivolity. When I’m home all day, there’s something about slowly becoming aware of the aroma of stock simmering on the stove, attending it throughout the day, and then enjoying the rewards at the end of the day. That pleasure is compounded when my hands are cold from snow and they slowly thaw as I stir the stock, leaning next to a warm stove. Obviously these aren’t real conditions and don’t absolutely have to be followed to have a successful soup. For me, they are just what distinguishes a Snow Day Soup from any other run of the mill soup.
I just happened to have a leftover whole chicken and some rice from last week that was practically begging to be made into soup. In the morning, I picked all the meat from the bones and set the stock to simmer. Later that evening, I sauteed some onions and garlic and stole a few ladle-fuls of the stock, leaving the rest to simmer overnight. I also added a bit of leftover whey to up the protein content (pregnant you know). Because I had time to spare, I added what I consider one of the secret weapons of a good soup: a Parmesan rind. These take awhile to melt in, but can’t be outdone in the savoriness and body they add to soup. When the rind was melted, I added the cooked rice and shredded chicken. Then, at the last minute to preserve its color, I added a couple spoonfuls of homemade pesto. Perfect. Even though I hadn’t been out playing in the snow all day, this soup bore the same sense of comfort and well-being that a hot meal did after my childhood snow days. With this soup, the weather can wear white all she likes.
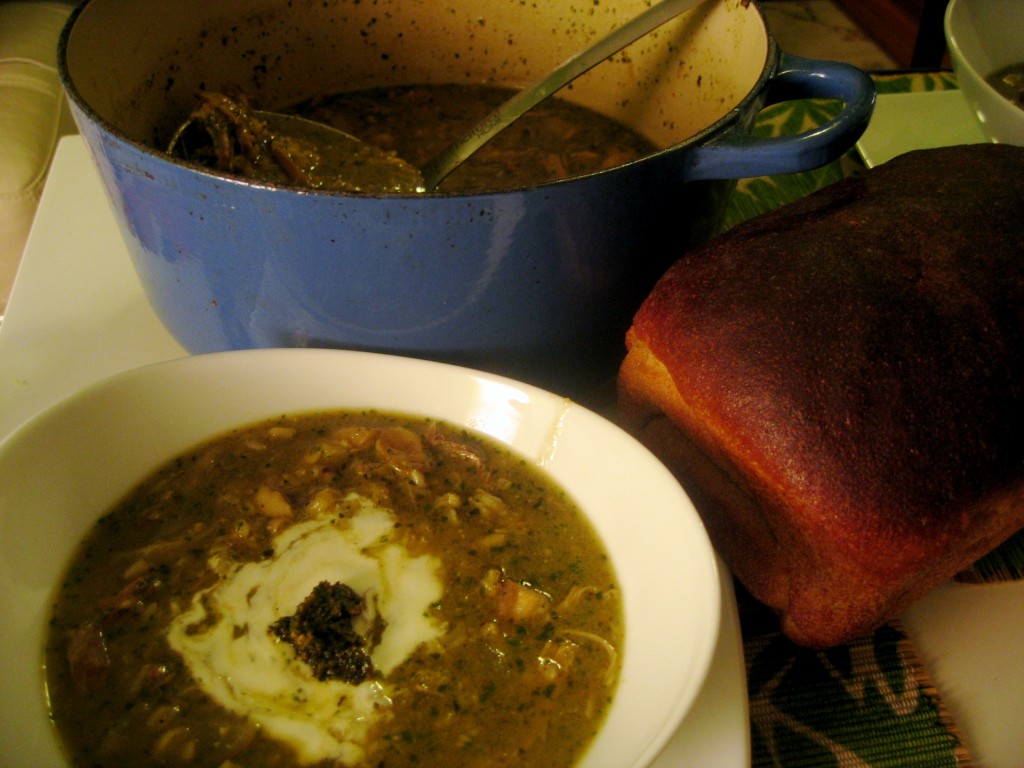
Snow Day Pesto Chicken and Rice Soup
1 onion, chopped
3 cloves of garlic, grated or chopped
2 Tbs butter
1 quart chicken stock (opt. part whey)
1 hunk Parmesan cheese rind
2-3 cups leftover chicken
1-2 cups cooked rice
2 Tbs pesto
salt and pepper
yogurt, sour cream, creme fraiche
In a medium pot, melt the butter. When is sizzles, add the onions and garlic with a pinch of salt. Stir to coat them with the butter. Let them cook until they start to soften. Add the broth and cheese rind. Bring to a boil, reduce heat to a simmer, cover the pot, and let simmer until the rind is melted into the stock. If you have a few stubborn bits that refuse to melt, just fish them out. Add the chicken and rice and cook till heated through. Right before serving, add the pesto. If you add it too far in advance, it will loose its vibrant green. Taste and season with salt and pepper. Serve with a swirl of yogurt and a dollop of extra pesto.
Posted 13 years, 11 months ago at 7:06 am. Add a comment
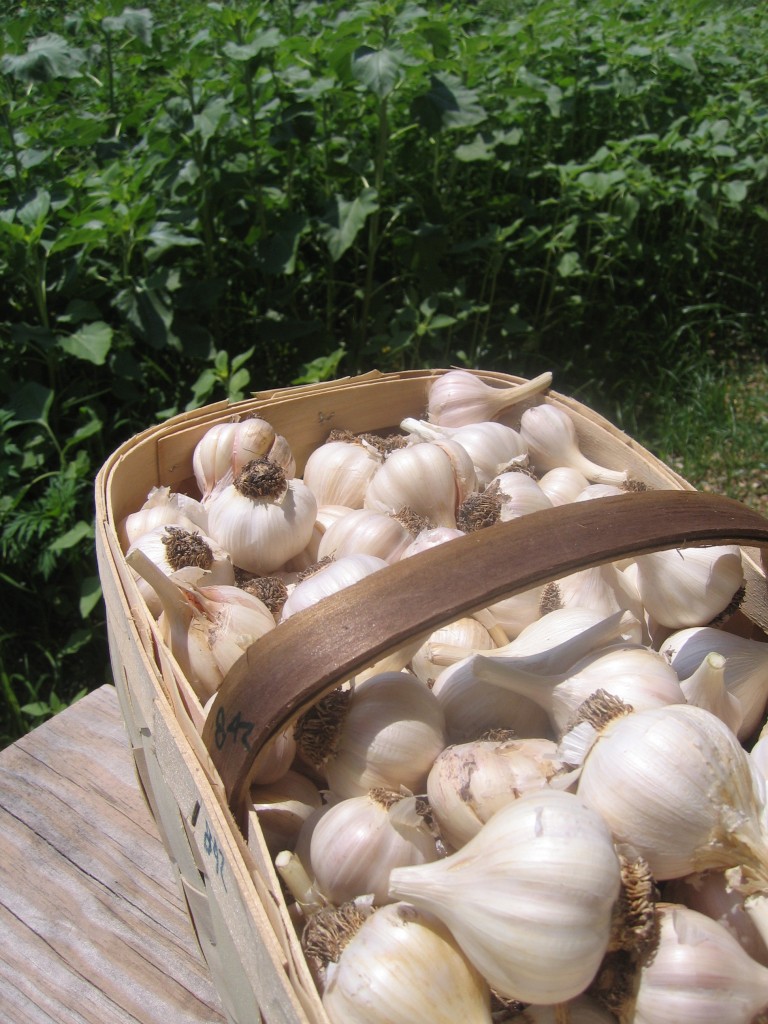 Roasting garlic is so simple and such an easy way to add more depth of flavor to cooking that I don’t know why I don’t do it more often. Garlic’s chemistry allows the cook to manipulate it in different ways, getting a different flavor as a result. Alliin and Allicin, the two volitale compounds in garlic that give it its garlic-ness, are only released when the cell walls are damaged by chopping or chewing. It’s the mixture of these two compounds that give garlic its sharp hot flavor and aroma that many people love in things like hummus. However, other people find raw garlic too harsh but still enjoy the flavor. For cooks, this means that roasting garlic, a method where the cloves stay whole, produces a milder garlic flavor and brings out garlic’s natural sweetness.
Roasted garlic is a helpful ingredient to have on hand. You can make a killer garlic bread in a flash by just spreading the garlic onto bread, sprinkling with salt, and toasting for a few minutes. It also adds roasty sweetness to soups and stew that is just not possible to get by simply throwing in chopped garlic. While it does take awhile to make, the prep is very simple and most of the time you can do something else. Also, you can roast as many heads of garlic at one time as you’d like. Once roasted, it will keep for a about a week in the fridge and a few months in the freezer.
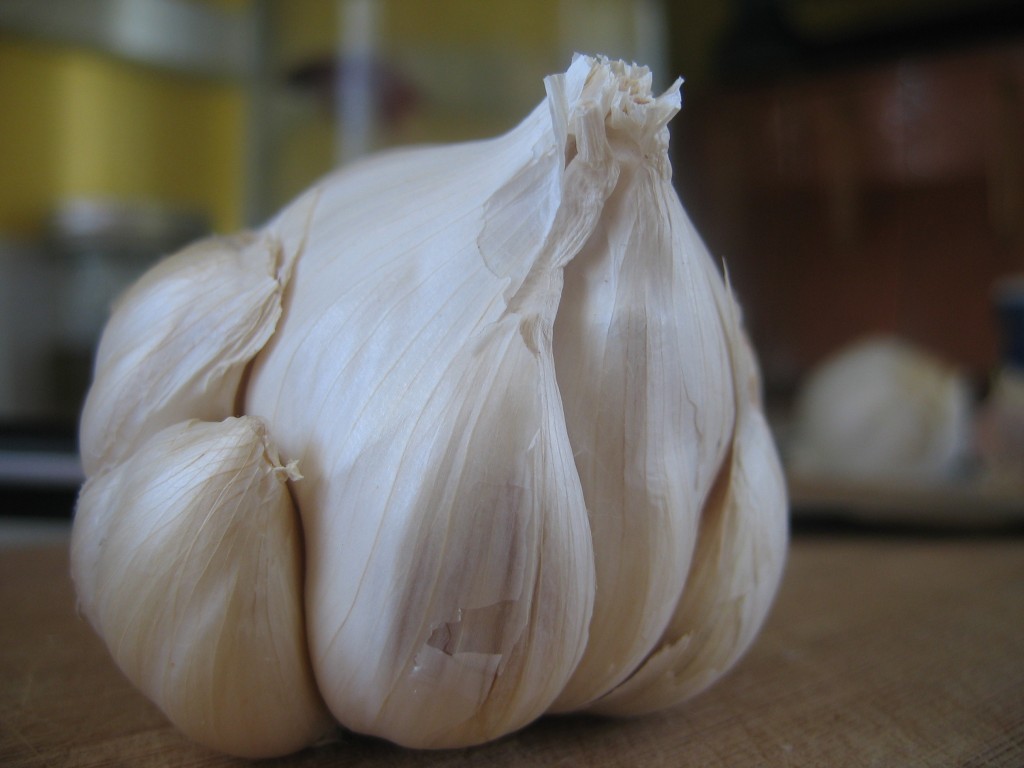 Before you start prepping the garlic, preheat you oven to 400°. Then face your garlic. Begin by peeling off all the loose papery layers. You should be able to see the individual cloves.
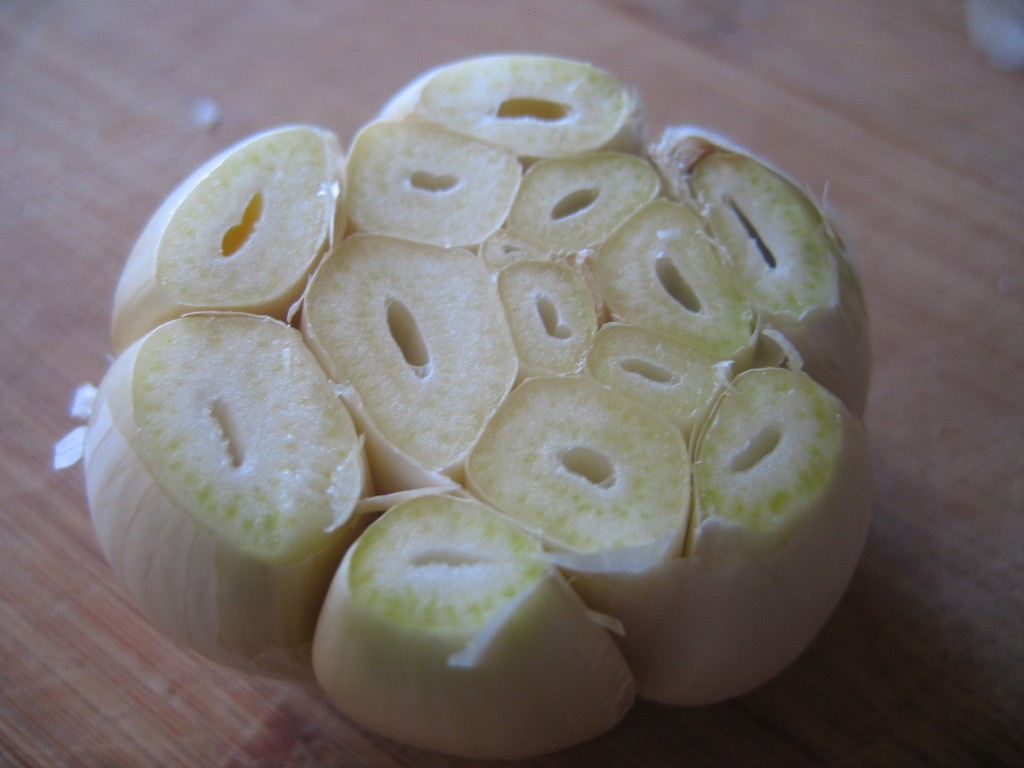 Next, cut the top off the garlic. Once fell chop should take care of most of the cloves. However, if you take the time to cut the tops off any cloves that were missed, you will be rewarded.
After the tops are cut off (you could save all the little caps to use later, if you’d like), rub the whole head with olive oil. I know it means getting your hands greasy, but it really is most efficient with your hands. I suppose this could be an excellent job for children….However you accomplish this, the oil rubbed garlic should then go on a baking sheet and into the oven for about 30-40 minutes. Alternatively, you could wrap the heads into little nests of aluminum foil. I just don’t like wasting foil if I don’t have to. I’ve found the baking sheet works just fine. 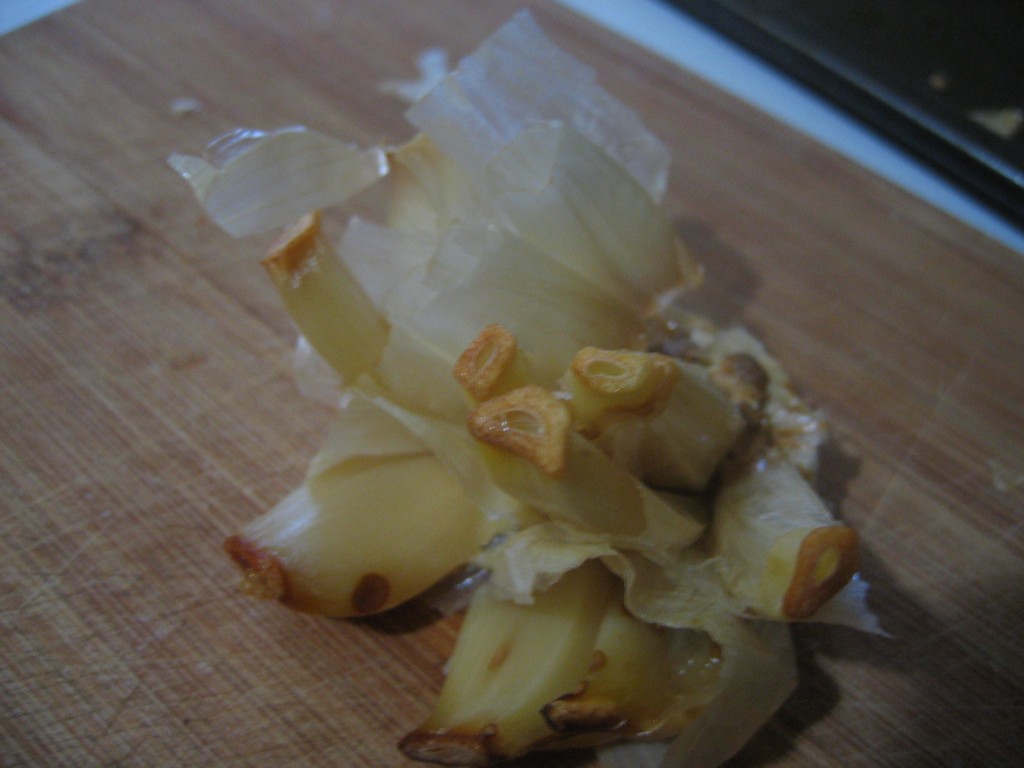 When it’s done, the tops of the cloves should be lightly caramelized, but not burned. Let it cool until you can touch it comfortably. When cool, the garlic should be soft enough that you can press gently on the base of the head and pop all the cloves out. This is where you will be rewarded if you took the time to cut the tops off well. The cloves will slide right out if you’ve cut a big enough hole. If not, well, you’ll get a garlic squirt in the eye. Try it, you’ll see what I mean.
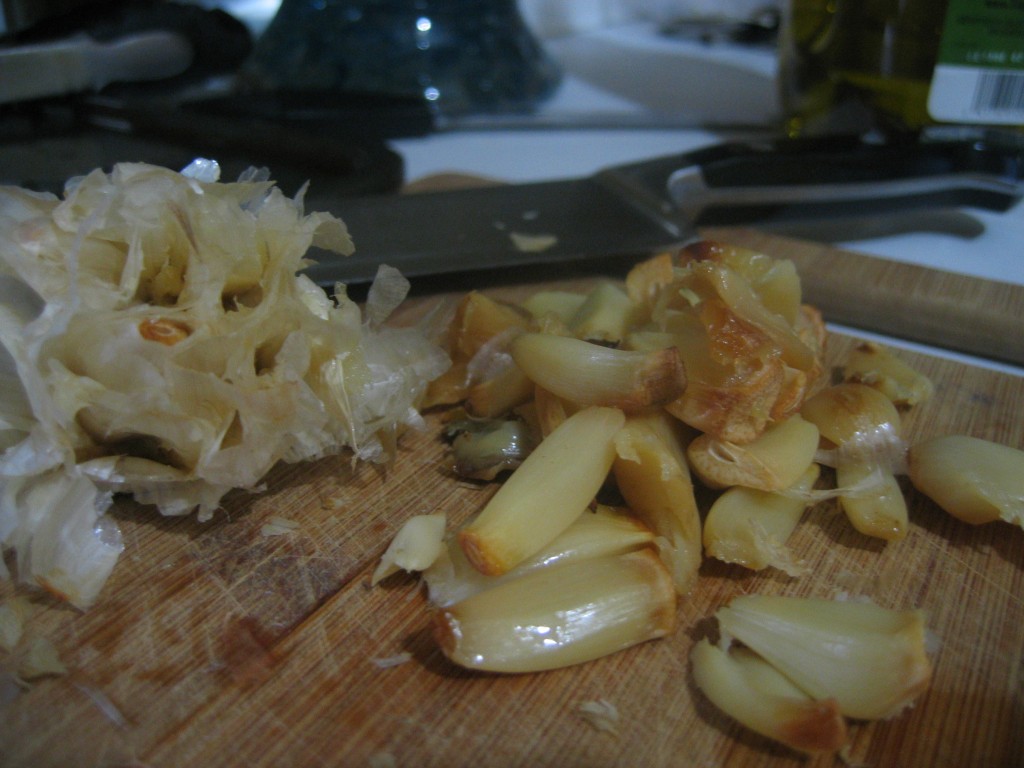 At this point, your roasted garlic is ready to use. Try mixing it with butter or cream cheese for a delicious spread. Make garlic bread, toss into soups, or saute with veggies. I can never resist eating at least one clove by itself, especially after smelling it roast for half an hour.
Enjoy!
Posted 13 years, 11 months ago at 7:28 am. Add a comment
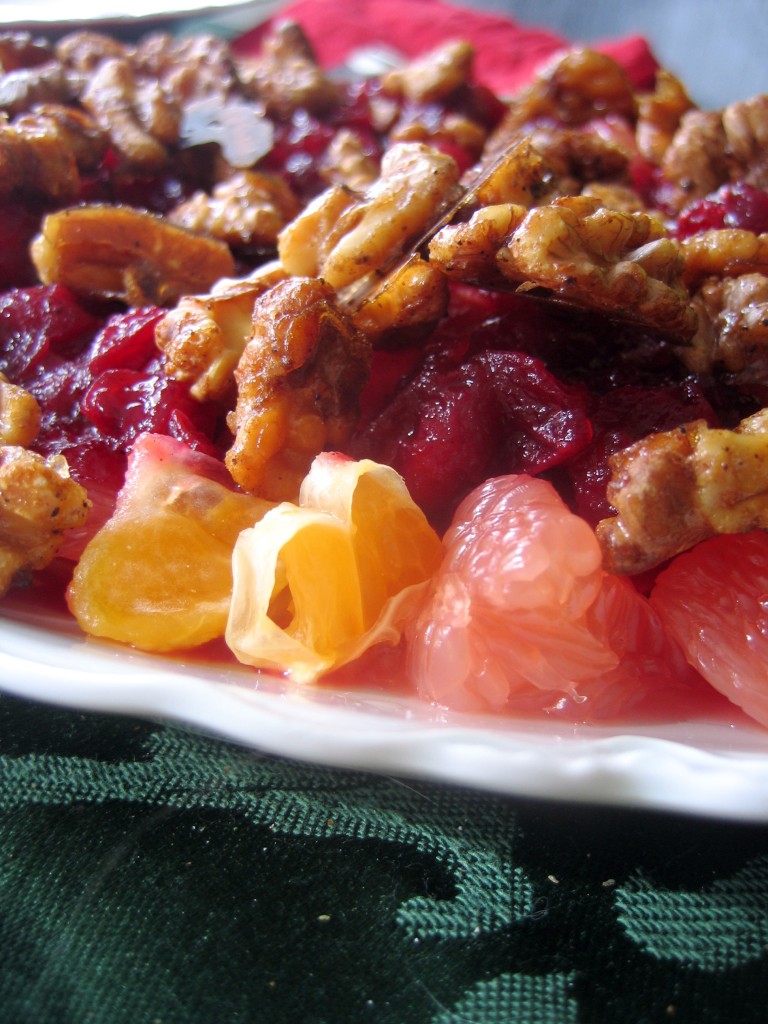 I love citrus. While most cookbooks and online recipe forums seem to think that citrus is best enjoyed in the dog days of summer, I love that it’s true season is actually the mid- winter months. Like a doting grandmother who slips you a bright little foil wrapped piece of candy in that long half hour before dinner, citrus waits till the dark days of winter to ripen.
While it’s true that citrus isn’t necessarily local, unless you happen to live in Florida, California, or parts of Texas, it is a seasonal fruit, just like anything else. So, while most of us can’t buy citrus from one of our farmer friends, it is still possible to buy it at the peak of its season when it’s freshest, imported the least number of miles, and most importantly– tastiest. For me, that means taking advantage of the natural down time that winter gives us and chowing down on all the grapefruits, tangerines, oranges, clementines, lemons, limes, pomelos, and tangelos I can eat. Peggy Bourjaily wrote an excellent piece for NPR’s Kitchen Window series about this practical locavorism.
Citrus in winter is also a nostalgic thing for me. Truth be told, I would probably eat it in the winter even if it wasn’t in season then. (Conveniently enough though, I get to keep my moral high ground.) As kids, we would always get an orange in the toe of our stocking at Christmas. I don’t know how often we actually ate the orange, but it was of utmost importance that it was there. Since starting our own Christmas traditions, Mr. Quotidian and I have dispensed with the usual stockings filled with odds and ends that end up getting lost or broken in a few weeks. Instead, we leave a pad of paper and pencil by the stockings and write down memories of the other person, then put the memory in the other’s stocking. So, by Christmas morning, we have stockings stuffed with memories. I love the tradition, but obviously an orange would feel rather out of place in such a situation. However, a Christmas without citrus seemed hollow and dull. I realized the easiest way to solve the situation was to serve citrus at one of our Christmas meals. Since citrus doesn’t do well with a cheese fondue, Christmas Eve was out. However, when I remembered a recipe for a salad using oranges and cranberries, Christmas brunch seemed the ideal way to include this jolly, festive fruit. New Year’s brunch would be delicious too…paired with a mimosa perhaps? Continue Reading…
Posted 13 years, 12 months ago at 6:52 pm. 1 comment
 No other time of year seems to hold as many traditions for me as Christmas. The ornaments get hauled up from the basement, the dust blown off the old pear boxes they’re stored in. Each is carefully unswaddled from its nest of ten year old paper towel and hung on the tree. Little Bethlehems are constructed throughout the house, forming a kind of Yuletide suburban sprawl. Each of the mangers stay empty until Christmas morning. The soundtrack changes frequently as each of us takes our turn choosing our favorite music. Little Brother with Mannheim Steamroller, me with Bing Crosby and Ella Fitzgereld, Mom with hymns.
And then there are the nine different tins of Christmas cookies piled on the counter. Their colors a hodgepodge of cheery greens, wintery blues, rich reds, and ornate golds. Inside each tin is a different cookie– mixing of different cookies into the same tin is strictly forbidden. The cookies range from simple peanut clusters that take just minutes to make to Springerale cookies that get printed with a special rolling pin, cut apart, then left out to dry overnight. Chocolate pinwheels look fancy but are easy to make. Of course sugar cookies make their appearance, the amount of frosting and sprinkles adorning Rudolph’s antlers directly correlating to the age of the person who decorated them.
Somewhere in that pile of tins lies the gingerbread men. These always arrived with grandma’s return address on the box. There was exactly one gingerbread cookie per person. But we never thought we were getting jipped. These weren’t just any gingerbread cookies. As a child, they were as big as my face. I know this because I did it . . . holding the cookie up to my face and inhaling the sweet spicy scent. And they were intricately decorated with all different colors of frosting. The gingerbread men had textured vests and pants. The gingerbread girls had striped skirts and braids that looked almost real. They were the kind of cookies that the children in “The Night Before Christmas” dreamed about. Because they were so big, these cookies were eaten piecemeal . . . an arm or a leg at a time. Each of of us had a different method of decimating our cookie. I worked in a clockwise pattern starting with the head. Continue Reading…
Posted 14 years ago at 5:14 pm. Add a comment
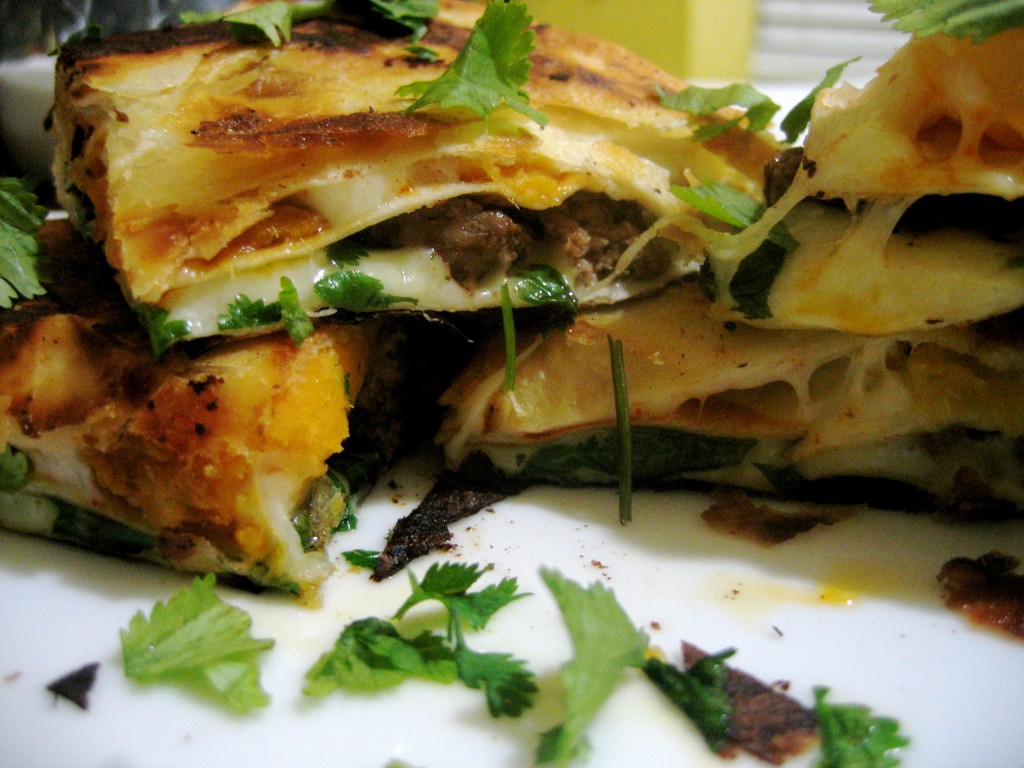
Sweet Potatoes. They aren’t just Thanksgiving food for us anymore. No longer are they like batty Aunt Helga who only gets invited around for holiday dinners for fear of what she might say. And even then, her peculiar ravings get smothered under a sweet blanket of “Yes Aunt Helga, dear” and “How nice you look today dear Aunt Helga” or “Have some more sweet potatoes topped with marshmallows Aunt Helga dear.”
No more. With this recipe begins a new era where sweet potatoes are invited to regular family dinners, like Mexican Night or Italian Night (sweet potato gnocchi, anyone?). Who knows, sweet potatoes might even score an invite to Pizza Night. Continue Reading…
Posted 14 years, 2 months ago at 6:18 am. Add a comment
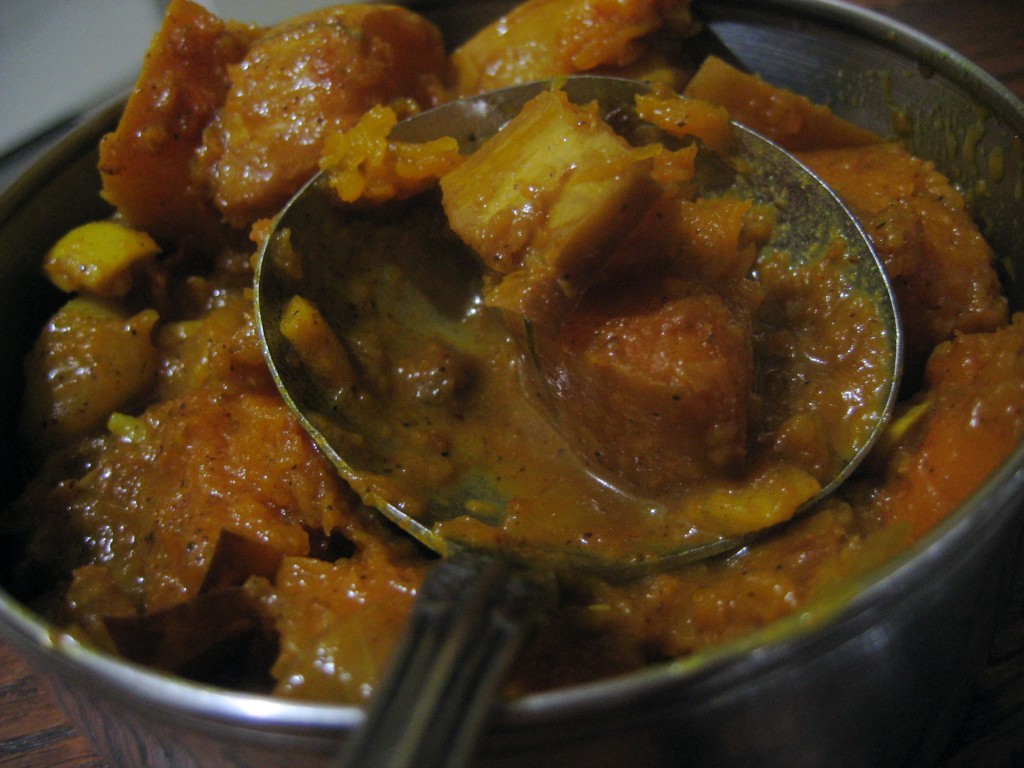 Technically, winter squash season started several weeks ago when we harvested our first batch of butternuts. It was one of those winsome moments in farming; so picturesque that it doesn’t seem possible that it’s real. A garden cart brimming with rosy-golden squash.
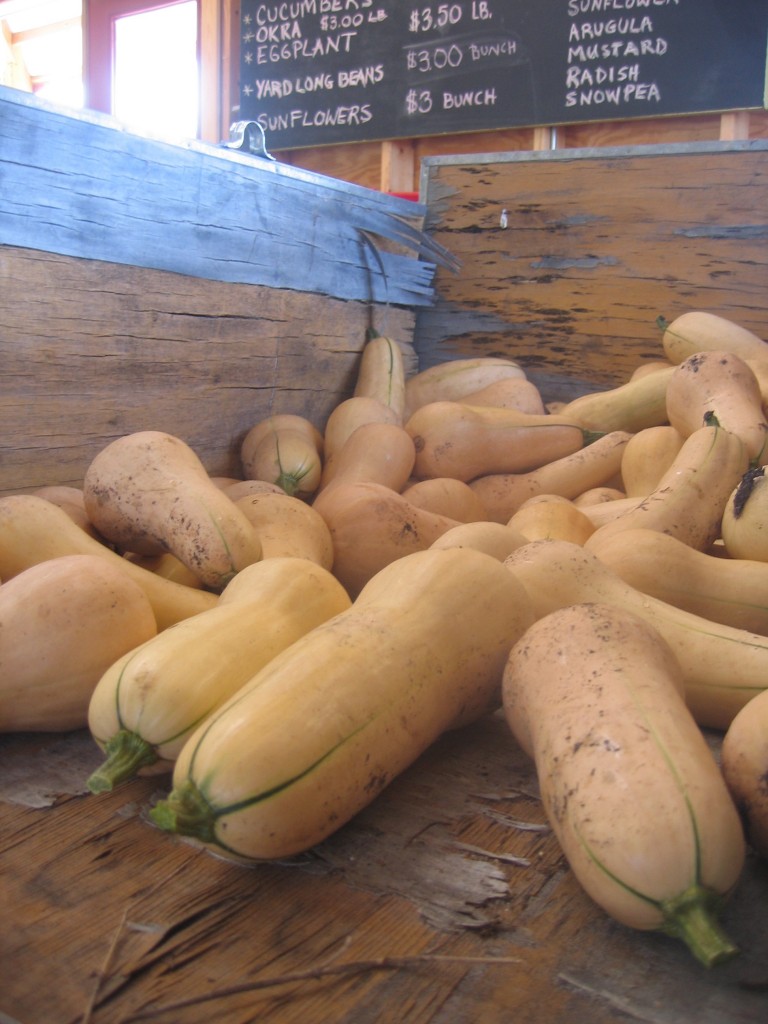
Even though we harvested the butternut squash several weeks ago, I’ve been waiting to use them until Autumn finally revealed herself. So it’s lucky that winter squash like these keep perfectly on the counter for several months because Autumn seemed to be even more of a procrastinator than usual this year.
In my family, winter squash were generally sweet things–dusted with brown sugar and dotted with raisins. However, inspired by my friend Kristen’s savory submission to a recent potluck, I decided to try a curry. The spices serve as a counterpoint to the squash’s natural sweetness. It seemed a mantle to grace Autumn’s sunburnt shoulders.
Continue Reading…
Posted 14 years, 2 months ago at 8:47 pm. Add a comment
 Like a delusional castaway on a deserted island, I’ve been seeing boats everywhere. Ever since writing about Zucchini Boats, my mind seems to have been opened to all the possibilities. Bananas, melons, bell peppers, mushrooms, tomatoes. It seems almost anything can become a “boat.”
Cucumbers seem especially suited to boat-ness. Many people already make them without knowing it by scraping out the seeds. What’s left behind is the perfect cavity to fill with something delicious. In this recipe, I chose to fill it with a salmon salad. A nice addition to my recipe would be some grated Parmesan cheese. I didn’t add it this time because we were also having goat cheese stuffed squash blossoms, and I didn’t want a cheese overload.
I think I like these better than the zucchini boats. They are crisp, fresh, and easy. Perfect for summer because they require no oven. I suppose they are raw? If you consider canned salmon raw, I suppose . . . ? I’m not up on the rule book for Raw Foods. At the very least, these boats don’t require any actual cooking, only assembly.
And the best part? They are best eaten like a hot dog.
Cucumber Boats
2 cucumbers
1 can salmon, sustainably harvested if you can find it
1 lemon
2 Tbs capers
1-2 small bell peppers, any color
1/4 cup grated Parmesan cheese (opt.)
salt and pepper
Put the salmon in a medium bowl and break it into pieces. You can pick out the bones if you want. Zest the lemon over the bowl. Then roll it under you palm a few times to release the juices. Cut it in half and squeeze the juice into the bowl, straining the seeds through your fingers. Add the capers. Chop the peppers into small pieces and add them the to bowl too. If you’re using cheese, add it now too. Cover the bowl and set it in the fridge to chill for a bit. Cut the cucumbers in half lengthwise. Use a spoon to scrape out the seeds. Fill the cavity with the salmon salad. Eat with your hands, like a hot dog.
Posted 14 years, 3 months ago at 6:34 am. 3 comments
 These were supposed to be cookies.
 Next, squish the top ends of the logs together. You are going to braid the strands together, just like hair. If you haven’t braided before, go find someone’s little sister to help you. Or use the pictures below.


 Once you’re done braiding, carefully transfer the loaves to a baking sheet. You can sprinkle them with cinnamon and sugar if you’d like. Or try coarse kosher salt, my personal favorite. Bake in the oven for 12-3o minutes, depending on the thickness of your loaves. Skinnier loaves will take less time, while thicker ones will take more time. To take the guess work out, use a probe style thermometer and bake the bread until it’s temperature reaches 200°. Cool on baking racks. Enjoy with butter, greek yogurt, or ricotta cheese.


